Step-by-step instructions for setting up Automatic Email Processor for Windows
This how-to walks you from the very first program start to a running profile that processes incoming emails automatically. By the end you will have set up an email account, created a profile with a monitored folder and configured a first task.
At a Glance
- Difficulty: Beginner
- Time required: about 10 - 15 minutes
- Prerequisites: Automatic Email Processor installed, credentials for an email mailbox (IMAP, POP3 or Microsoft 365)
- Example task: Save attachments automatically to a folder
Step 1: Start the program
Launch Automatic Email Processor from the start menu or the desktop shortcut. On first start, the profile list is empty.
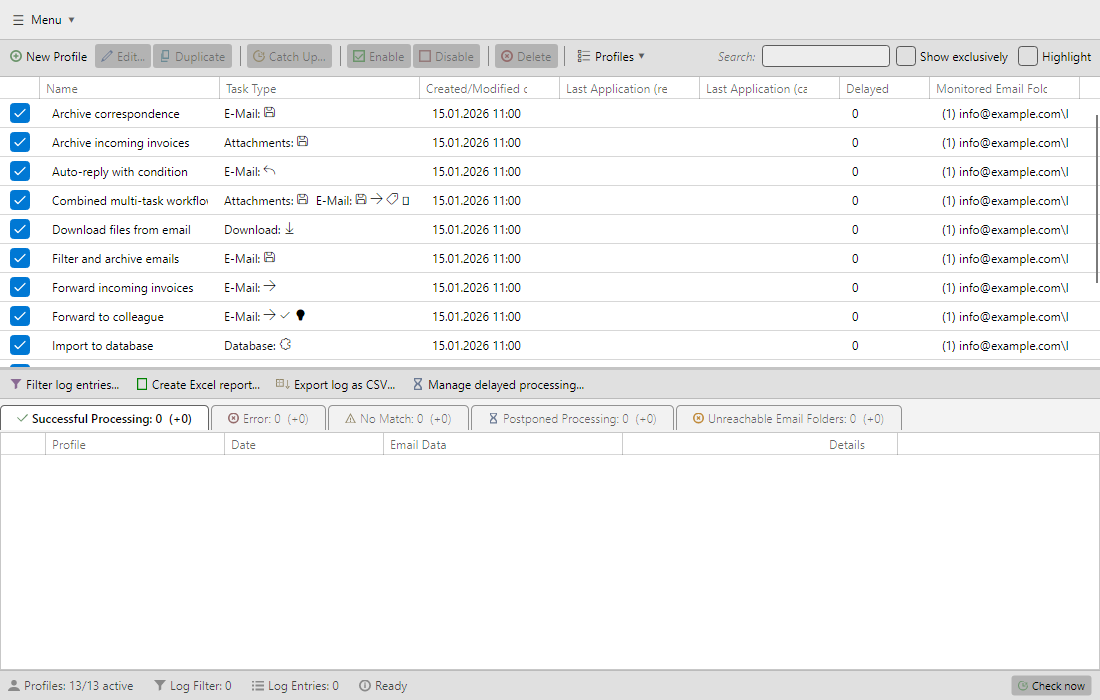
The main window has four areas:
- Menu and toolbars (top) - main menu, buttons for profile management, plus search and filter
- Profile list - shows your profiles with status and task type
- Log list (bottom) - processing log with the result of every run
- Status bar (very bottom) - status display such as “Processing message 1 of 3” and the Check now button
 Main window
Step 2: Set up an email account
Before a profile can do anything, at least one email account must be configured.
- Open Menu → Options… → Email accounts.
- Click Add… and pick the matching account type:
- Microsoft 365 (Graph) - for Microsoft 365 / Exchange Online mailboxes (typical business inboxes)
- IMAP - for most classic mailboxes, e.g. IONOS, Strato, GMX, Web.de, T-Online or Gmail
- POP3 - for simple mailboxes that only fetch messages (no persistent sync of folders or read state)
- Enter the credentials. The default server addresses for your provider are usually documented on its help pages - a quick search like GMX IMAP server settings typically returns the right values (analogous for IONOS, Strato, Web.de, T-Online …). Detailed how-tos are available for IMAP and Microsoft 365.
- Click Test connection to verify the login.
- Close the editor with OK.
Tip: Give the account a meaningful display name (e.g. “Incoming invoices” or “Personal mailbox”). This name appears later in the account dropdown of every profile.
Step 3: Create a new profile
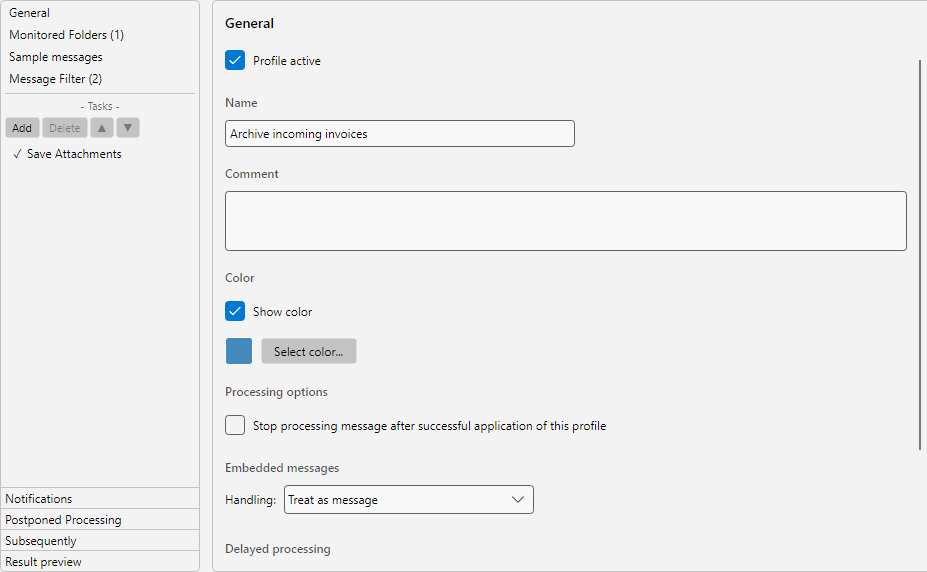
In the profile toolbar click New profile. The Profile settings window opens on the General category.
- Enter a meaningful name (e.g. “Archive incoming invoices”).
- Optionally pick a profile colour for visual distinction in the log list.
- Leave Active ticked - otherwise the profile won’t run later.
 Profile settings - General
In the category list on the left, switch to Monitored folders and click Add….
- Pick the configured account.
- Pick the folder to monitor - usually the inbox.
- Optionally enable Include subfolders.
- Confirm with OK.
The profile then checks at regular intervals whether new messages have arrived in this folder. For IMAP accounts the program additionally detects new messages in real time via an IDLE connection (the mailbox notifies the program as soon as a new mail arrives), so messages typically appear in the program within seconds (see online help chapter 50.5 - real-time detection).
 Monitored folders
Step 5: Set a filter (optional)
If only specific messages should be processed, define matching conditions under Message filter.
Example - “only PDF attachments from a specific sender”:
- Click Add… in the filter list.
- Pick the criterion From - contains -
supplier@company.com.
- Add a second criterion: Attachment file name - ends with -
.pdf.
- Leave the connector at AND so both conditions must apply.
Without a filter, every incoming message in the monitored folder is processed. A complete overview of all filter types is available in chapter 30 of the online help.
 Message filter
Pick an action from the task categories (e.g. Save attachments), set it to Active and fill in the parameters.
Example - save attachments:
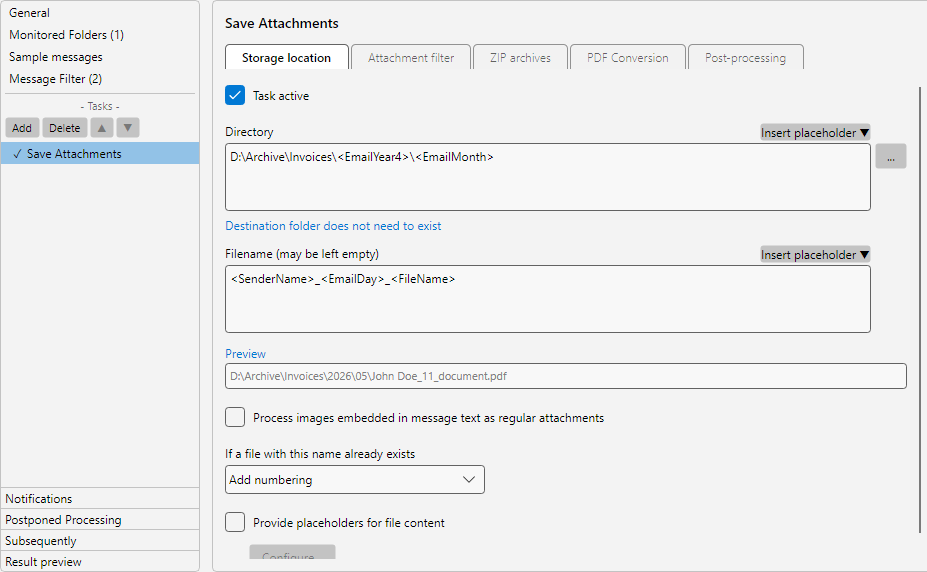
- Switch to the Save attachments category.
- Set the status to Active.
- Enter a base directory (e.g.
D:\Archive\Invoices).
- Optionally: define a subfolder with placeholders (e.g.
<EmailYear4>\<EmailMonth> for a year/month folder structure).
- Optionally: enter a file name with placeholders (e.g.
<SenderName>_<EmailDay>_<FileName>).
- The Placeholders button opens a list of all available placeholders.
 Save attachments task
Other available task types include:
- Save email - store the message as
.eml or .msg
- Print message / Print attachments - send directly to a physical or PDF printer
- Forward email / Automatic reply - forward or reply to a message
- Save to database - write message properties into a SQL table
- Move to trash, Set flag, Set category - applied to the original message after processing
A complete list of all tasks is available in chapters 9 - 26 of the online help.
Step 7: Save and verify the profile
- Click OK in the Profile settings window to save the profile.
- The profile appears in the profile list with a green status dot (active).
- Click Check now in the status bar at the bottom to trigger the first run manually, or wait for the next scheduled interval.
What happens on the first run
On the very first run of a new profile, all messages already present in the monitored folder are indexed - i.e. marked as “known” in an internal list - but not processed. This is by design, so you don’t suddenly get hundreds or thousands of existing messages worked through at once.
While the program is still indexing, it may look like nothing is happening - the log list stays empty. The status bar shows whether a run is currently active.
How to test that your profile works:
- Option A - test message: Wait until the first run is complete (the status bar shows a countdown to the next check again) and then send yourself a matching test email. It will be processed during the next run and appear as an entry in the log list.
- Option B - catch up: Click Catch up… in the profile toolbar, pick a time range and optionally a single folder. Existing messages within that range are then checked against the filters and processed - so you can test the profile against real data without waiting for new messages.
Check the result
Once messages are actually processed (after a test message or a Catch up… run), the log list on the right shows new entries:
| Result |
Meaning |
| Success |
Message was processed, all tasks completed successfully |
| No match |
Message did not match the profile’s filter criteria |
| Error |
Processing was interrupted - check the detail message in the entry |
| Postponed |
Message is waiting for the configured delay time |
| Unreachable |
Account or folder was not reachable during the check |
Double-click an entry to open the processing detail with filter check, executed tasks and saved attachments.