Step-by-step instructions for connecting a Microsoft 365 mailbox to Automatic Email Processor for Windows
This how-to shows how to add a Microsoft 365 or Office 365 mailbox to Automatic Email Processor. Unlike a classic IMAP account, no password is stored. Instead, Automatic Email Processor uses Microsoft’s official sign-in flow (OAuth) - just like Outlook on the web. The connection works with two-factor authentication enabled and on accounts managed via single sign-on.
At a Glance
- Difficulty: Beginner
- Time required: about 3 minutes
- Prerequisites: A Microsoft 365 mailbox with an active license and an internet connection
- Outcome: A connected mailbox that can be picked as a data source in any profile
Step 1: Open the email accounts page
Open the main menu and pick Options…. In the program options, switch to the Email accounts category and click Add… in the toolbar.
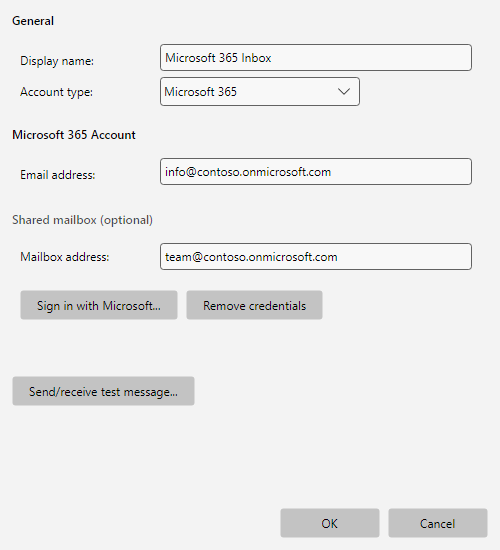
Step 2: Pick the Microsoft 365 account type
Enter a meaningful display name (e.g. “Microsoft 365 mailbox” or “Incoming invoices”). Pick Microsoft 365 as the account type. The editor hides the IMAP/SMTP fields and shows the Microsoft 365 specific inputs instead.
 Account editor in Microsoft 365 mode
Step 3: Enter the email address
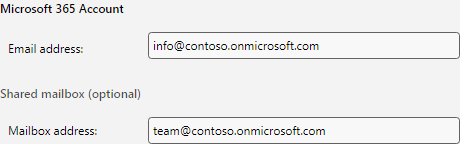
In the Email address field enter the address of the Microsoft 365 mailbox (e.g. info@contoso.onmicrosoft.com or info@your-company.com).
 Email address and shared mailbox
Optional - shared mailbox: If Automatic Email Processor should access a shared mailbox, enter its address in the Mailbox address field. Sign-in still uses your personal account (step 4); Microsoft 365 then routes the access to the shared mailbox. Prerequisite: your account has full access to the shared mailbox - an IT administrator configures this in the Microsoft 365 admin center.
Leave the field empty if only your personal mailbox should be connected.
Step 4: Sign in to Microsoft
Click Sign in to Microsoft…. The default browser opens the official Microsoft sign-in page.
 Sign-in buttons for Microsoft
In the browser dialog:
- Enter the Microsoft 365 email address.
- Enter the password.
- If active, complete two-factor authentication (Authenticator app, SMS or call code).
- On first sign-in, review the permissions requested by Automatic Email Processor and confirm with Accept.
After a successful sign-in the browser window closes automatically and the account editor shows the success state.
Step 5: Verify the success state
Below the sign-in buttons the confirmation Authentication successful appears.
 Successful sign-in
From this point on, Automatic Email Processor stores only an encrypted access token in your Windows user profile - no password. Microsoft 365 refreshes the token in the background (typically every 60-90 days), as long as the program runs regularly. After longer inactivity or a forced re-sign-in you may need to use Sign in to Microsoft… again.
Step 6: Send and receive a test message
Click Send/receive test message… at the bottom of the editor. The program sends a short test email to the configured address and then tries to fetch it again via Microsoft Graph.
 Send/receive test message
- Success: A confirmation appears - close the editor with OK.
- Send or receive error: For shared mailboxes, verify that the signed-in account has full access. On first configuration it may take 1-2 minutes for Microsoft 365 to complete internal background tasks - if needed, click the button again.
Step 7: Use the account in a profile
Click OK to close the editor and return to the accounts list. The new account appears with display name, type (“Microsoft 365”) and email address.
To use the account in a profile, open a profile for editing and switch to Monitored folders → Add…. The new Microsoft 365 account now appears in the account dropdown. The rest works as described in Getting started.