Step-by-step instructions for automatically saving attachments with Automatic Email Processor for Windows
This how-to shows how to drop incoming email attachments into a tidy folder structure - with meaningful file names, targeted filter rules and automatically extracted ZIP archives. The example used here is archiving incoming invoices.
At a Glance
- Difficulty: Beginner
- Time required: about 10 minutes
- Prerequisites: A profile with a configured email account and monitored folder (see Getting started)
- Example: Drop PDF attachments from suppliers into a year/month folder structure
Step 1: Add the “Save attachments” task
Open the profile in the editor (double-click in the profile list or click Edit…).
- In the task toolbar click Add….
- Select Save attachments from the menu.
- The task appears in the task list on the left and is enabled by default.
Tip: A profile may combine several tasks - for example also “Save email” or “Post-process → Move to trash”.
Step 2: Structure the destination folder with placeholders
On the Storage location tab, enter the folder where attachments should be stored.
- Click the Folder field.
- Enter the base path, e.g.
D:\Archive\Invoices.
- Append placeholders to create a time-based structure, e.g.
D:\Archive\Invoices\<EmailYear4>\<EmailMonth>.
- The Insert placeholder button opens a list of all available placeholders.
The placeholders are replaced with the values of the actual message during each run - a mail from 2026-03-15 ends up in the folder D:\Archive\Invoices\2026\03.
 Configure storage location
Step 3: Define a file-name pattern
On the same tab, enter the pattern for the file name. Placeholders work here too.
Example: <SenderName>_<EmailDay>_<FileName>
This produces something like Max Mustermann_15_Invoice-2026-03.pdf during processing.
Tip: Leave the field empty to keep the original attachment name unchanged.
The Preview field shows the resulting name for the currently selected sample message - so you can verify the pattern before the profile runs in production.
Step 4: Behaviour when a file with the same name exists
Right below the Preview field you choose what should happen if a file with the same name already exists in the destination folder:
- Add numbering - a sequential number in parentheses is appended to the file name, e.g.
(1), (2).
- Overwrite - the existing file is replaced.
- Skip - the new file is discarded.
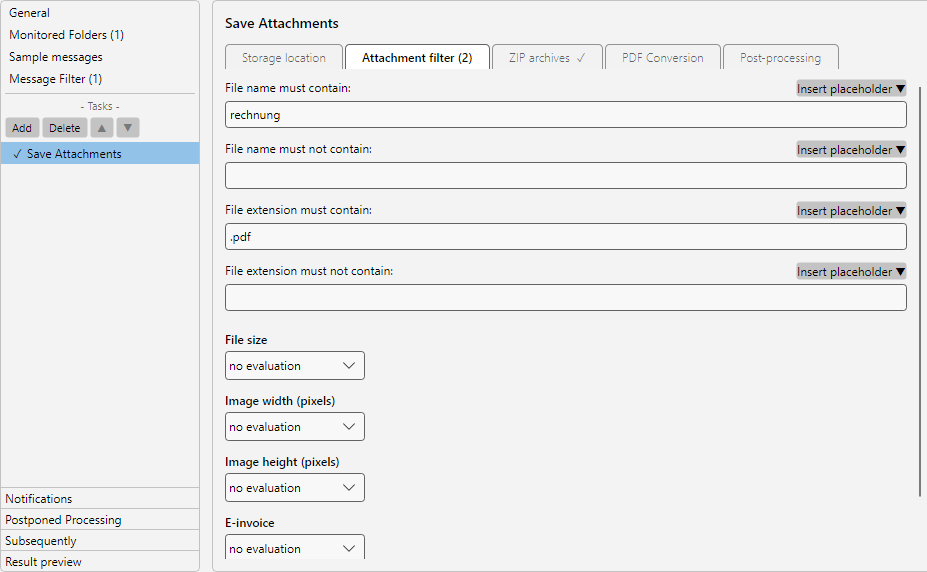
Step 5: Set the attachment filter
Switch to the Attachment filter tab to save only specific attachments. Without a filter, every attachment of the message is stored.
Examples for sensible filters:
- Restrict the file extension to
.pdf to extract only PDF invoices.
- File name contains
invoice to ignore delivery notes or marketing inserts.
 Attachment filter
The additional option Treat embedded images as regular attachments on the Storage location tab controls whether images embedded in the message body are also stored.
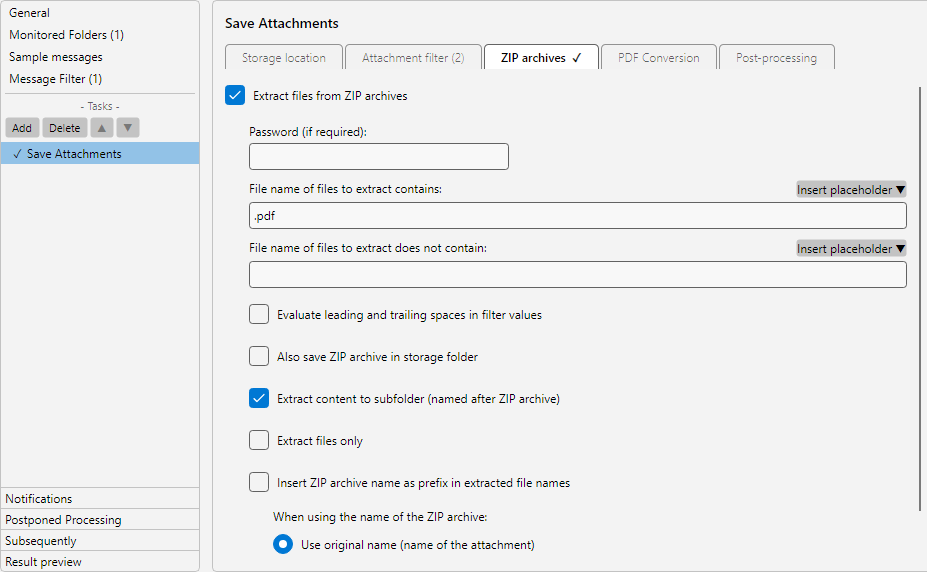
Step 6: Unpack ZIP archives automatically
If suppliers often deliver invoices as ZIP archives, the program can unpack them automatically. Switch to the ZIP archives tab.
- Enable Extract ZIPs.
- Enable Extract content into a subfolder (named after the ZIP archive) so all files of one ZIP land together in their own folder, not mixed up with others.
- Optionally: restrict the file filter, e.g. to
.pdf, so only the invoices are extracted from a ZIP.
- Optionally: store a password if the ZIPs are encrypted.
 ZIP archives
Note: To keep the original ZIP next to the extracted files, enable Also save the archive.
Step 7: Save and test the profile
- Close the Profile settings window with OK.
- Click Check now in the bottom status bar to trigger the next run manually.
- Send yourself a test email with a PDF attachment, or use Catch up… in the profile toolbar to test the profile against existing mailbox content.
The log list shows for every processed message which attachments were stored. Double-click an entry to open the processing detail with filter check, stored paths and any error messages.