Step-by-step instructions for automatically saving emails with Automatic Email Processor for Windows
This how-to shows how to archive incoming emails automatically as files - with meaningful file and folder names, in your preferred format and with embedded attachments. The example used here is archiving the entire business correspondence in a year/month folder structure.
At a Glance
- Difficulty: Beginner
- Time required: about 10 minutes
- Prerequisites: A profile with a configured email account and monitored folder (see Getting started)
- Example: Store incoming correspondence in original format under
D:\Archive\Emails\<Year>\<Month>
Step 1: Add the “Save email” task
Open the profile in the editor (double-click in the profile list or click Edit…).
- In the task toolbar click Add….
- Select Save email from the menu.
- The task appears in the task list on the left and is enabled by default.
Tip: A profile may combine several tasks - for example also “Save attachments” or “Post-process → Mark as read”.
On the File type tab, choose the format in which the message is stored. The selection determines which additional options appear below.
| Format |
Recommended for |
Particularity |
| EML |
Audit-ready archive |
Stores the original message 1:1 with all headers and attachments. Opens in any email client |
| MSG |
Outlook users |
Outlook format, directly readable in Outlook and the Windows preview |
| HTML |
Readable in a browser |
Content with formatting, no attachments |
| TXT |
Full-text search, older systems |
Plain text, no formatting, no attachments |
| PDF |
Long-term archive, receipts |
Attachments can be appended as additional pages or embedded inside the PDF |
For EML and MSG, the option Preserve encryption can additionally be enabled - so S/MIME-encrypted messages stay protected.
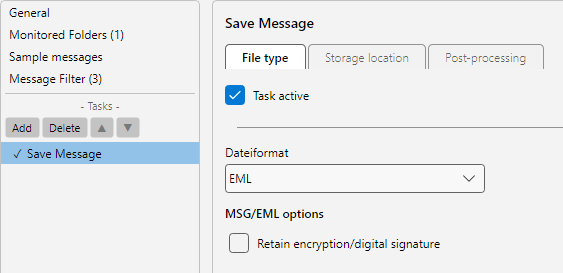 Choose file format
Step 3: Storage location and file name with placeholders
Switch to the Storage location tab.
- Click into the Folder field.
- Enter the base path, e.g.
D:\Archive\Emails.
- Append placeholders to create a time-based structure, e.g.
D:\Archive\Emails\<EmailYear4>\<EmailMonth>.
- The Insert placeholder button opens a list of all available placeholders (date, sender, subject, lookup table values, values extracted from the message body, …).
Below, enter the file name pattern. Example: <EmailDay>_<SenderName>_<Subject> produces something like 15_Max Mustermann_Order-confirmation-2026-03. The file extension (.eml, .msg, .pdf …) is appended automatically based on the chosen format.
The Preview field instantly shows the full path that would result for the currently selected sample message - so you can spot invalid characters or broken placeholders before the profile runs in production.
 Configure storage location
Tip: If the destination folder does not exist yet, the program creates it automatically. The link Destination folder must already exist below the folder field lets you change this behaviour.
Step 4: Behaviour when a file with the same name exists
On the same tab, under If a file with the same name already exists, choose what should happen if a file with the same name already lives in the destination folder:
- Add numbering - a sequential number in parentheses is appended to the file name, e.g.
(1), (2). Recommended for archives where no record may get lost.
- Overwrite - the existing file is replaced.
- Skip - the new file is not stored.
- Add date and time - appends the processing date and time, e.g. when several messages land within the same second.
Step 5: Header with sender and recipient
For the formats HTML, TXT and PDF, a header with the most important message data can be inserted at the top of every file - useful for printouts and quick lookups.
Under Header (PDF: own sub-tab) enable the desired fields, e.g. From, To, Subject, Received. Font, size and order can be configured there as well.
Step 6: Embed PDF attachments or append as pages
For the PDF format, two mechanisms exist for attachments. They can be combined.
Append attachments as pages - images and PDF attachments are added directly into the generated PDF. Enable this option and switch to the sub-tab Attachment filter → Append attachments as pages to append only specific attachments, e.g. by extension .pdf or via the e-invoice filter (ZUGFeRD).
Embed attachments - attachments are embedded as file attachments inside the PDF (visible as a paperclip in PDF readers). This variant is useful to keep e.g. Excel sheets or Office documents tied to the email in an audit-ready way without showing them inline.
Note: With Add bookmarks the resulting PDF is structured with clickable jump points (email header, every attachment as its own entry). With Keep original PDF bookmarks the bookmarks of attached PDFs are preserved.
Step 7: Save and test the profile
- Close the Profile settings window with OK.
- Click Check now in the bottom status bar to trigger the next run manually.
- Send yourself a test email or use Catch up… in the profile toolbar to test the profile against existing mailbox content.
The log list shows for every processed message at which path the file was stored. Double-click an entry to open the processing detail with filter check, stored paths and any error messages. Right-click → Open file opens the saved email directly.