E-invoices contain all invoice data in structured form - invoice number, amounts, supplier, line items. This how-to shows how Automatic X-Invoice Processor automatically writes this data out as a CSV file: as a continuous invoice journal for Excel, as a line item list or as an import file for a follow-up system.
At a Glance
- Difficulty: Beginner
- Time required: about 10 minutes
- Prerequisites: Automatic X-Invoice Processor installed; a folder where e-invoices arrive
- Task used: Save extract as CSV
Video tutorial: Extract invoice data to CSV (with narration and optional subtitles)
Step 1: Create a profile
- Click New profile… in the profile toolbar and enter a name (e.g. "Invoice journal").
- Under Mode, choose the file type of your invoices: Process PDF file (ZUGFeRD) or Process XML file (XRechnung).
- Under Monitored folders, add the inbox folder and add a typical invoice under Example invoices.
The basic setup is described in detail in the how-to "Getting started".
Click Add in the task list and choose Save extract as CSV.
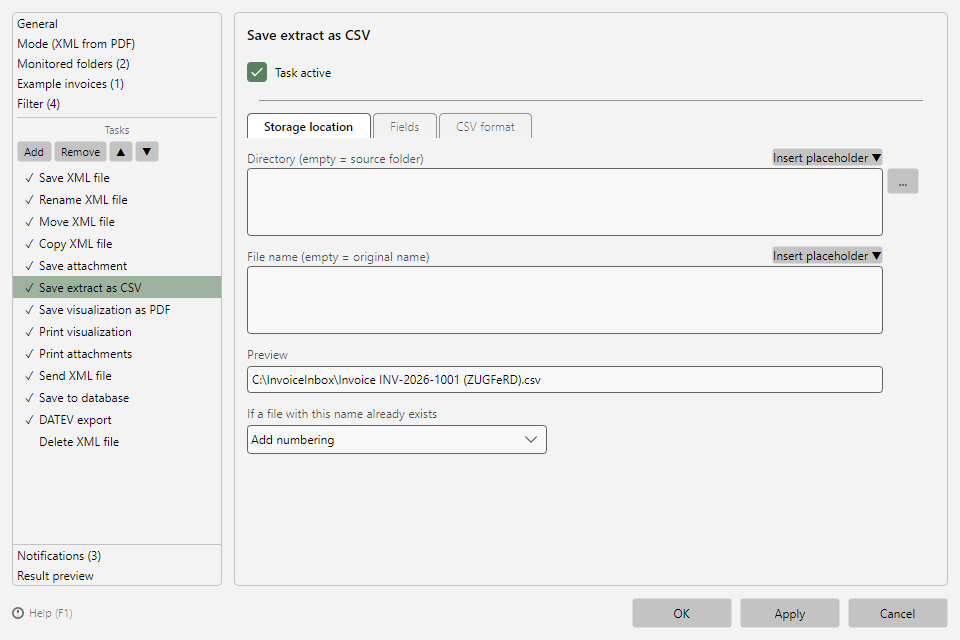 Save extract as CSV task with the Storage location, Fields and CSV format tabs
On the Storage location tab, enter the target directory and file name (placeholder support; without input, the original file name with the extension .csv is used).
Step 3: Compose the fields
On the Fields tab you compose the fields to extract - they become the CSV columns in exactly this order:
- Via Add you choose from all invoice fields: invoice data (number, date, amounts), seller/buyer, payment data (IBAN, due date), line item fields and file properties.
- Use the arrow buttons to change the order.
Tip: Multiple… opens a list of all fields to check - this way you compose many columns in one go. If another profile already has the right field list, copy it with Import….
Header or line item list? If the field selection contains at least one line item field (article, quantity, unit price, ...), the program writes one row per invoice line item - the header data (invoice number etc.) is repeated in every row. Without line item fields, exactly one row per invoice is written.
On the CSV format tab:
| Setting |
Recommendation |
| CSV collective file |
Enable for a continuous journal: all invoices are appended to ONE file; an automatic backup copy (.bak) protects the file against corruption |
| CSV column headers |
Enable so the field names appear as the first row (for the collective file only when it is created) |
| CSV delimiter |
Leave empty = the system's list separator (directly Excel-compatible) |
| Encoding / Code page |
UTF-8 with BOM is preset - directly Excel-compatible; only change it if the target system expects otherwise |
Tip - monthly journal: With date placeholders in the file name (e.g. Invoice journal <InvoiceYear>-<InvoiceMonth>), combined with the collective file, one CSV per month is created automatically.