Monitor folders - Send new PDF files automatically by email
Step-by-step instructions for automated sending of PDF files by email with Automatic PDF Processor for Windows
Introduction
This tutorial will show you how to set up a hot folder. If the filter criteria are met, Automatic PDF Processor will send all
new PDF documents placed in this folder automatically to the designated email recipient. After creating the profile, you can
optionally use the Catch-up function from the upper toolbar to send a batch of PDF files already existing in that folder.
Create a new profile
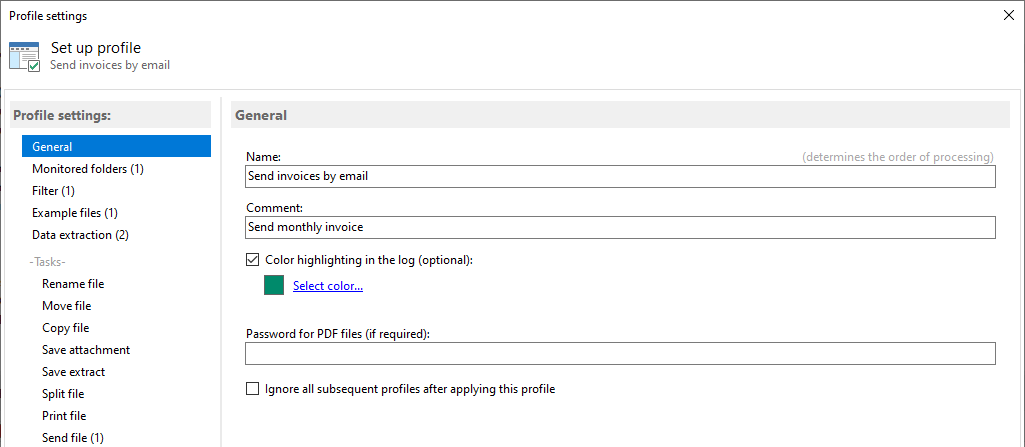
Click the "New Profile..." button in the upper toolbar to create a new profile and open the configuration dialog box. Give the
profile a suitable name (for example, Send invoices by email) and optionally enter a comment. You can have the profile
color-coded to better distinguish tasks performed in the log list. If required, the password for the PDF files can be entered in
the input field below.
Specify the folder(s) to be monitored
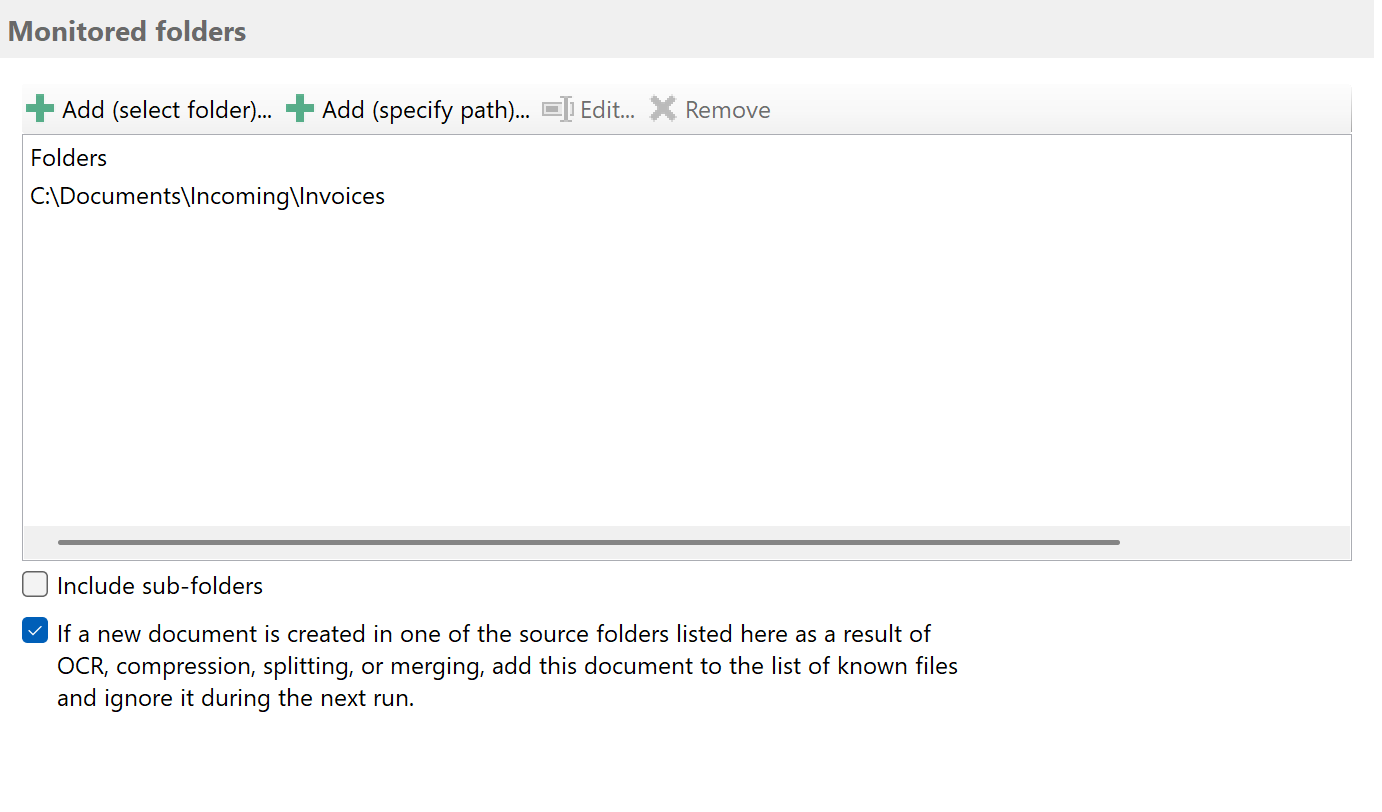
The next step is to specify one (or optionally several) folders to be monitored. As soon as new PDF files arrive in this
folder, they will be detected by the program and (provided the filter criteria are met) automatically processed - in this case,
sent as an email attachment. Click the "Add..." button and select one of the folders listed there.
Set one or more filters
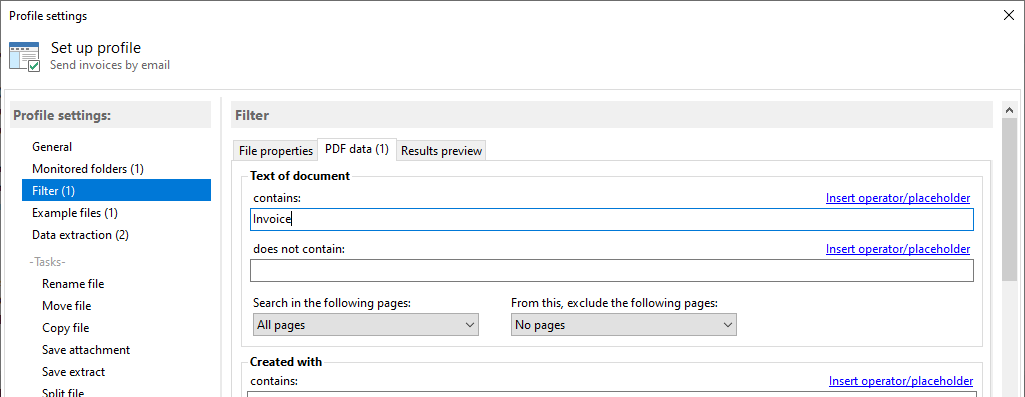
Optionally set various filter criteria here to send only specific PDF files by mail. For example, enter a part of the file
name. In addition, you can enter a term from the document text, for example, Invoice. Also supported is the use of a list
containing, for example, all customer names or numbers, of which the document must contain at least one value. Filter terms can
be combined with logical AND and OR. The adjacent "Preview Results" tab shows whether the sample files added (in the
next step) meet the filter criteria. New PDF files dropped into the watched folder will be sent if you do not enter a filter
term.
Add five or more sample files
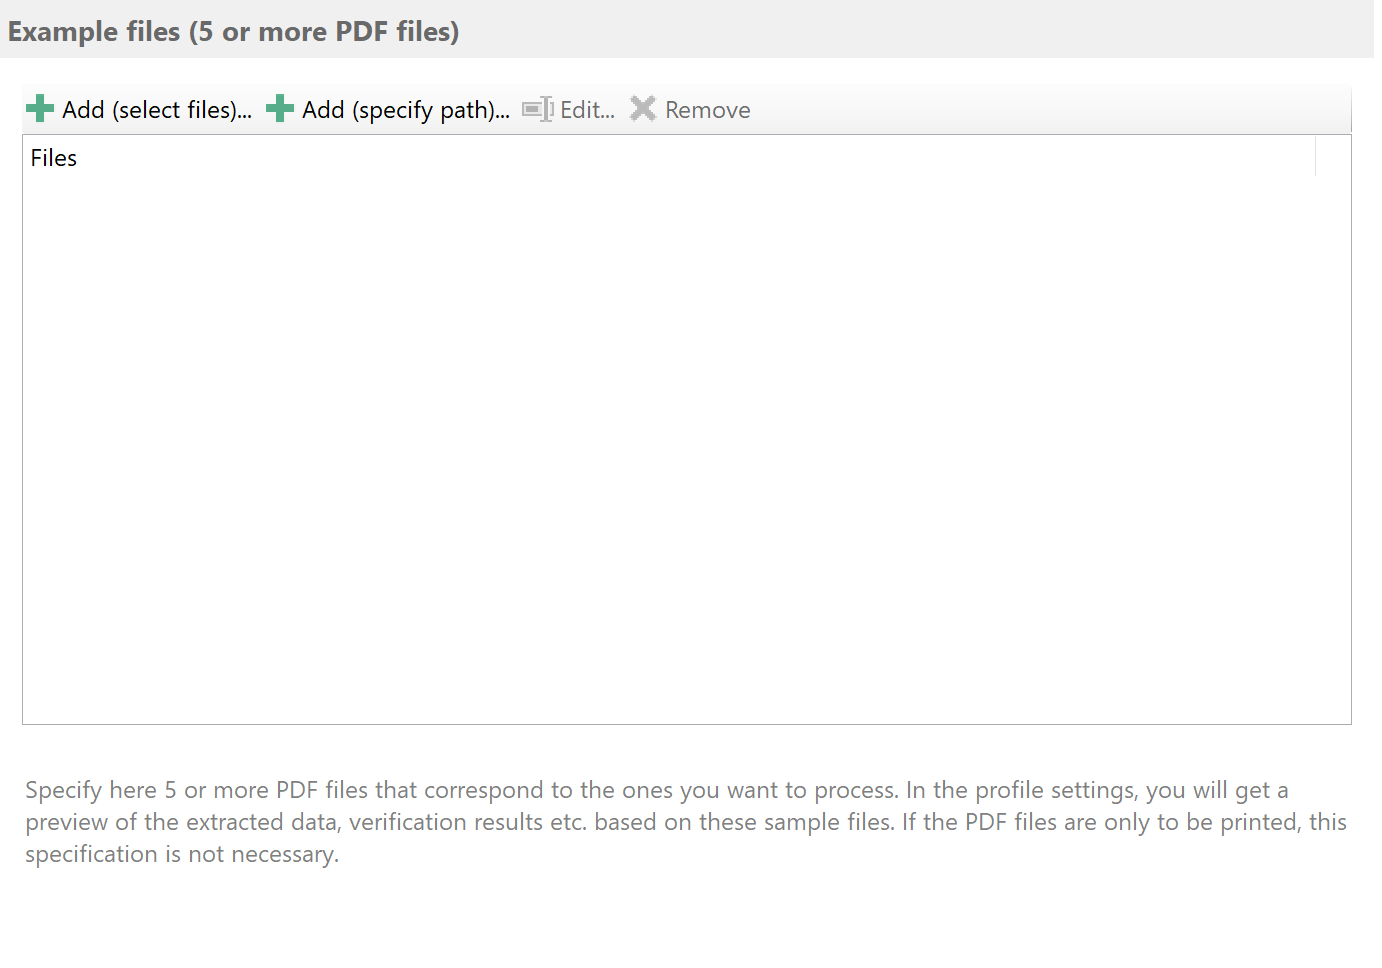
Specify five or more PDF files here which correspond to the files you want to process. In the profile settings, you will get a
preview of the extracted data, verification results, etc., based on these sample files. If you only want to print the PDF files, this step is not required. However, since the preview of the filter results is also based on the sample files,
adding the sample files is recommended. It is best to select files here that are located in a separate directory and are not
processed, especially not renamed or moved.
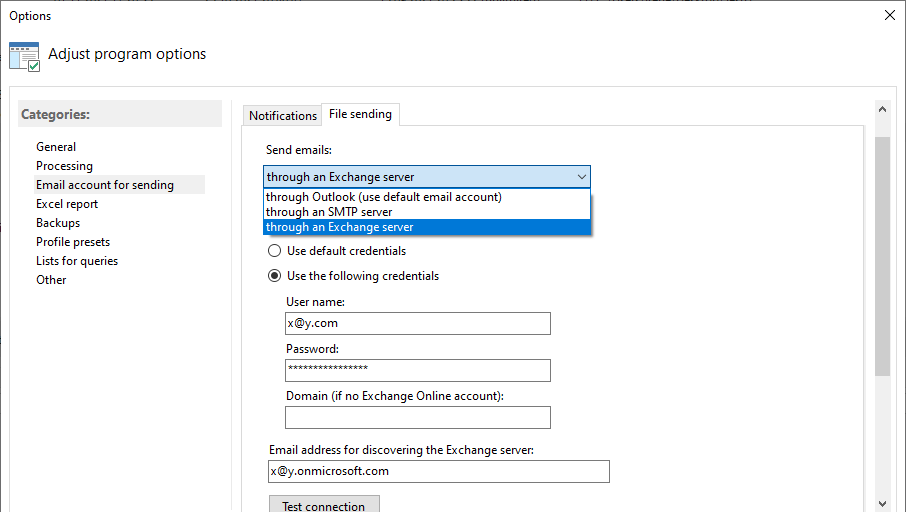
Configure the send settings in the program options
First open the program options via Menu -> Program Options. Then, in the category Email Account For Sending, on the tab File
Sending, configure the account that should be used to send the emails. Choose from:
- an Outlook email account
- an SMTP server
- Exchange Online (Microsoft 365)
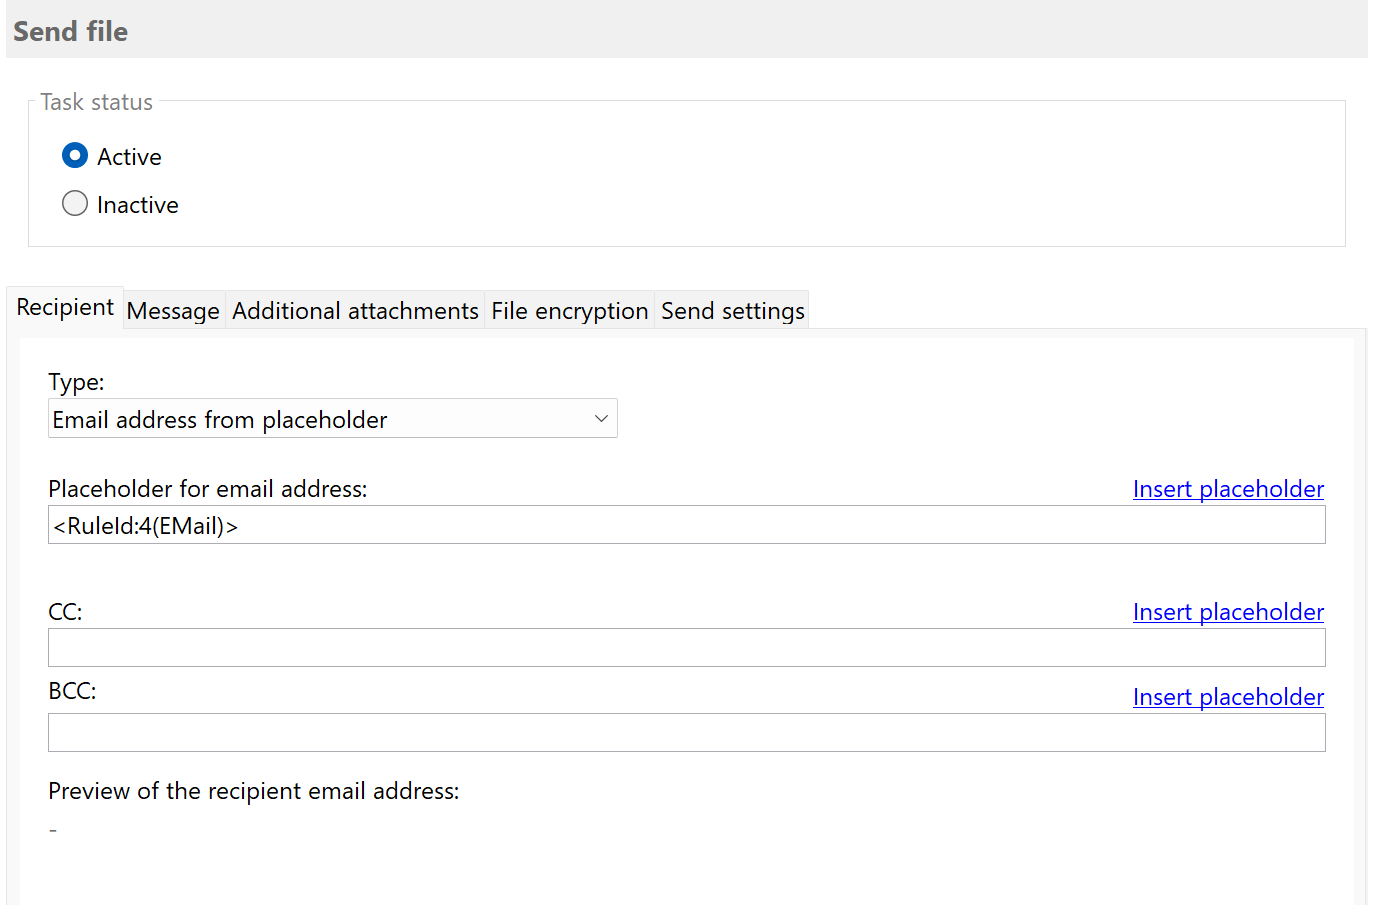
Activate and configure task Send File
Select the task type Send File and set the task status to Active.
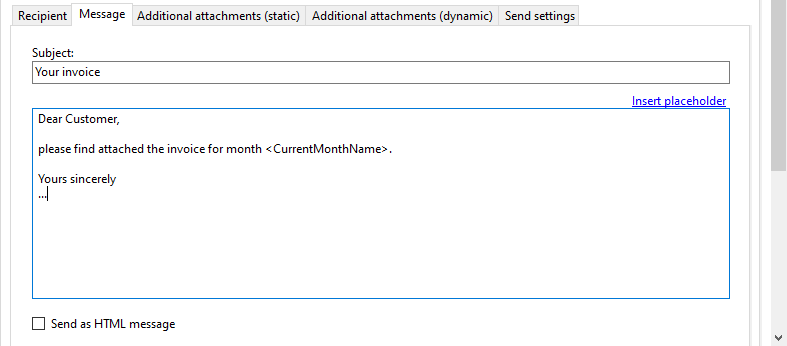
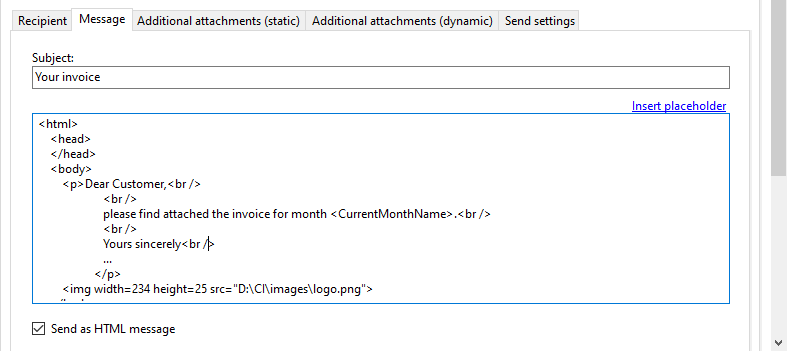
Entering the message text
The message text can be sent as plain text or HTML formatted. When using the option Send As HTML Message, the text must be entered in HTML format.
Additional static attachments
Here you can specify attachments to be included with the message. The term Static here means that each message will include the same email attachments.

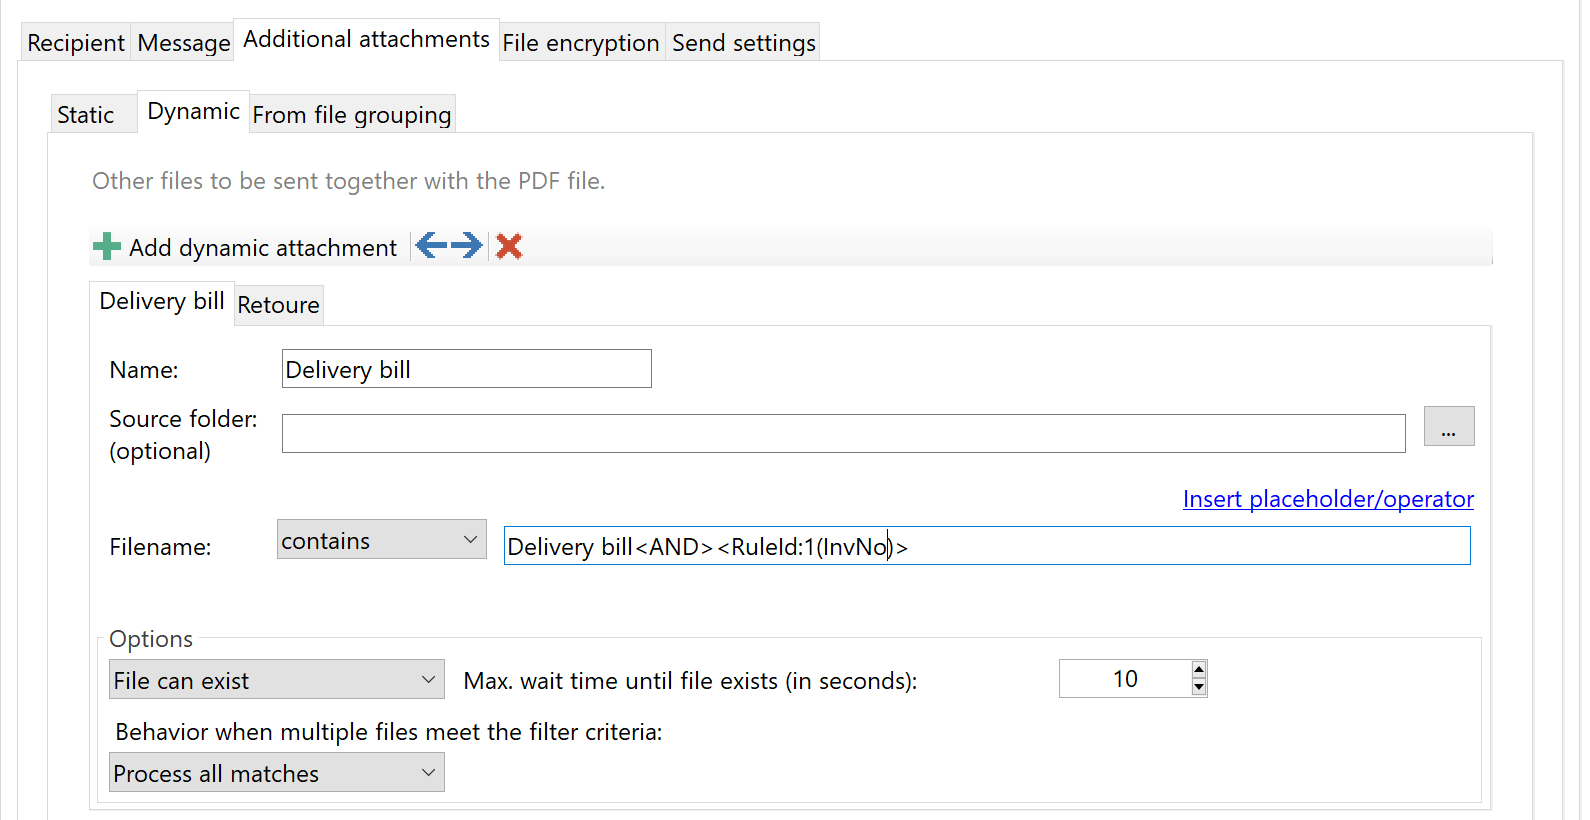
Additional dynamic attachments
Additional attachments can be defined here that should be sent together with each message but individually for each recipient. For
example, this could be a delivery bill, which should always be sent together with an invoice.
The delivery bill contains the invoice number in the file name as a common feature. To use this invoice number,
it must be provided (in the same profile) with a data extraction rule. InvNo is used as the rule name in this example.
Click on 'Add dynamic attachment' - a new tab appears. First, assign the name. The name serves only for clarity and is used, for
example, to label the tab. Enter 'File name -> contains: Delivery bill<AND>' and select the placeholder InvNo from the placeholder
menu above to add it to the filter.
Recommendations
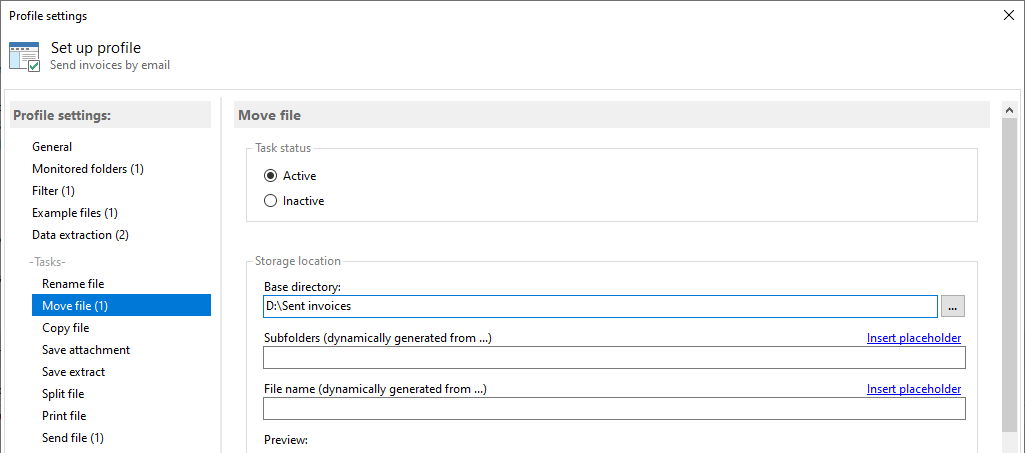
The sent message should additionally be moved to another folder with the name Processed or similar, if possible. To do this,
activate the task Move file and specify the destination path. This ensures that even without log data or in the case of damaged
log data, it is clear which files have already been sent. Thus, multiple processing can thus be ruled out beyond doubt.
Limit page count: When automatically sending confidential documents, it is recommended to set
a filter for the maximum page count (e.g., max. 3 pages) in the profile. This prevents bulk documents (e.g.,
consolidated invoices) from being sent as a whole if the upstream splitting is not configured correctly.
Review messages before sending: If you want to review messages before they are actually sent,
enable the "Save as draft" option in the sending options of the "Send file" task.
Messages will not be sent immediately but stored in the Drafts window, where you can review and adjust
recipients, subject, message text and attachments before manually triggering the send.
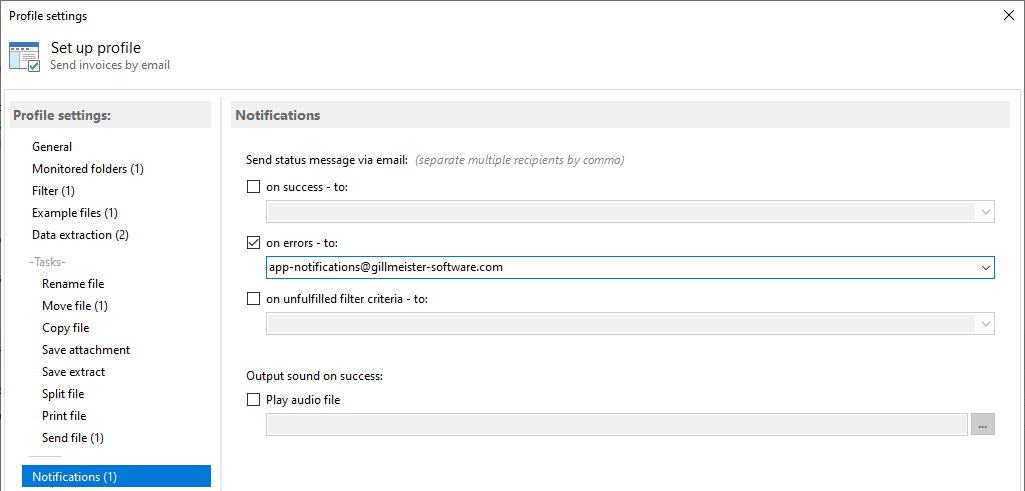
Notifications
The next step is to specify whether status messages regarding the processing of each PDF file should be sent to a particular
email address. The email can be sent using either the default Outlook email account, an SMTP server, or Exchange Online.
After successfully sending the PDF file, any sound file can be played.
Other step-by-step instructions
Getting Started
Basic Tasks
PDF Editing
E-Invoicing & Archiving
Practical Examples
Operation & Server
To the product page of Automatic PDF Processor