Step-by-step instructions for automatically extracting PDF form data with Automatic PDF Processor for Windows
Create a new profile
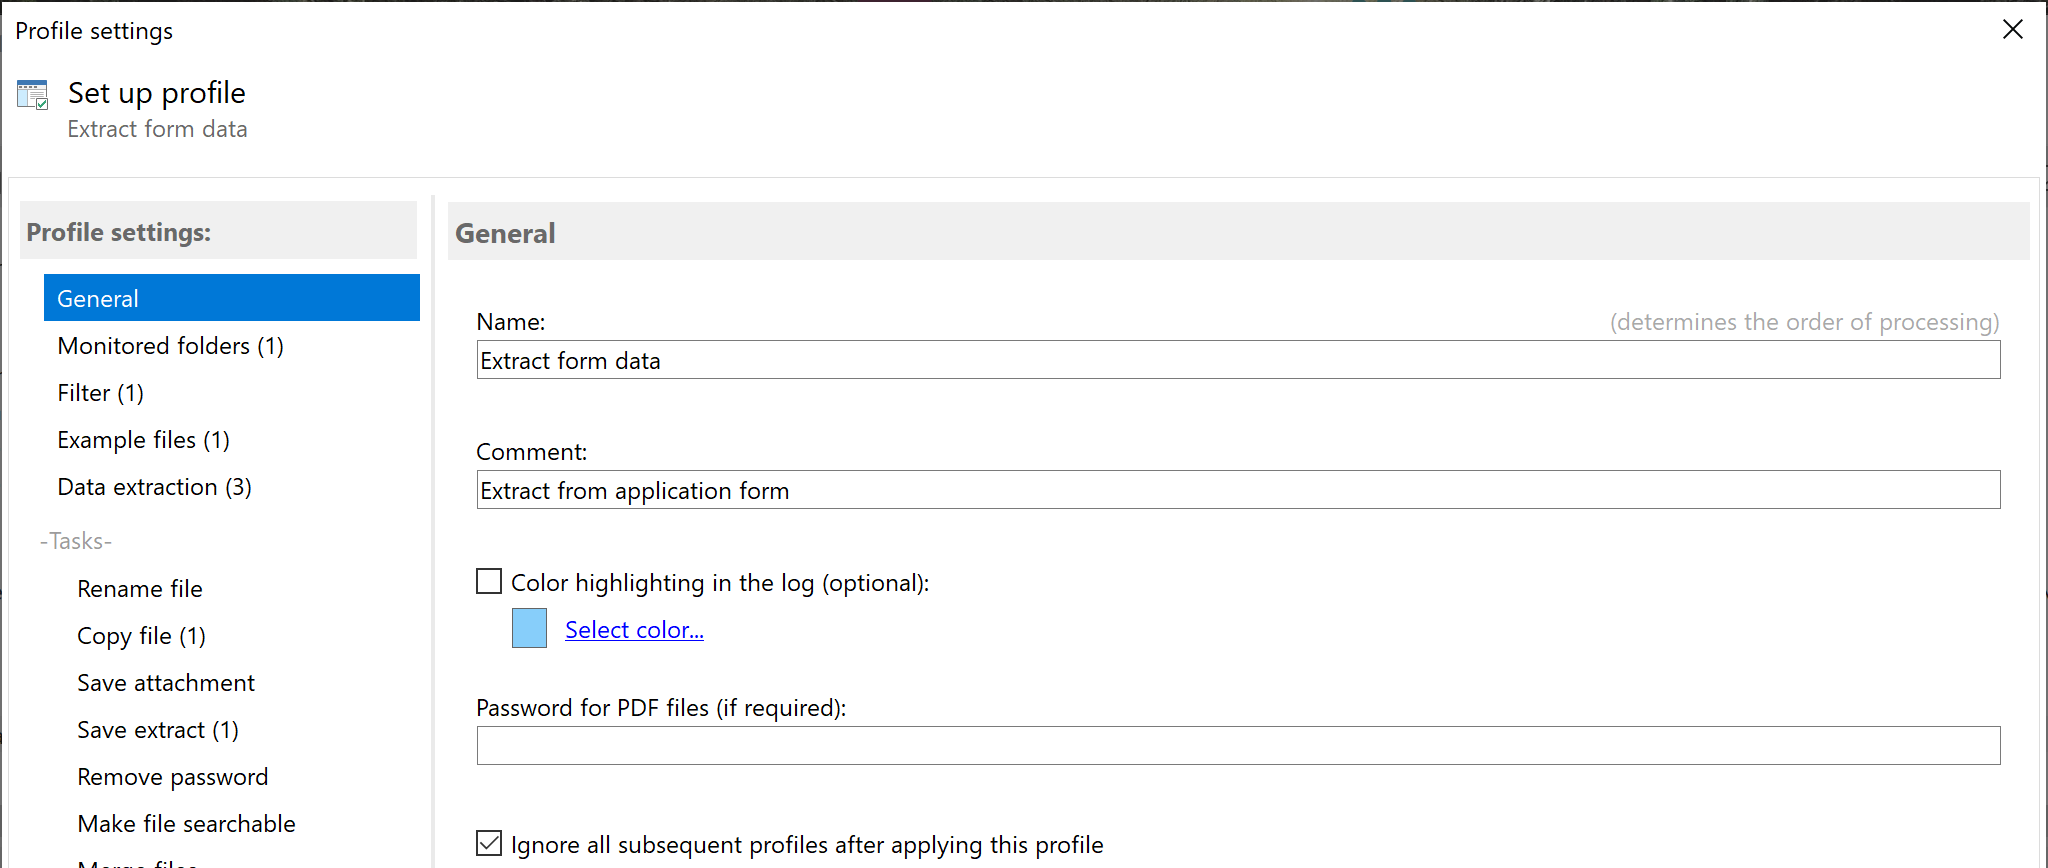
First, create a new profile by clicking the 'New profile...' button. Give the profile a meaningful name - for example, 'Export
PDF form data'. Optionally, add a comment, e.g., the type of form. You can have the profile highlighted in color to make it
easier to differentiate between completed tasks in the log list.
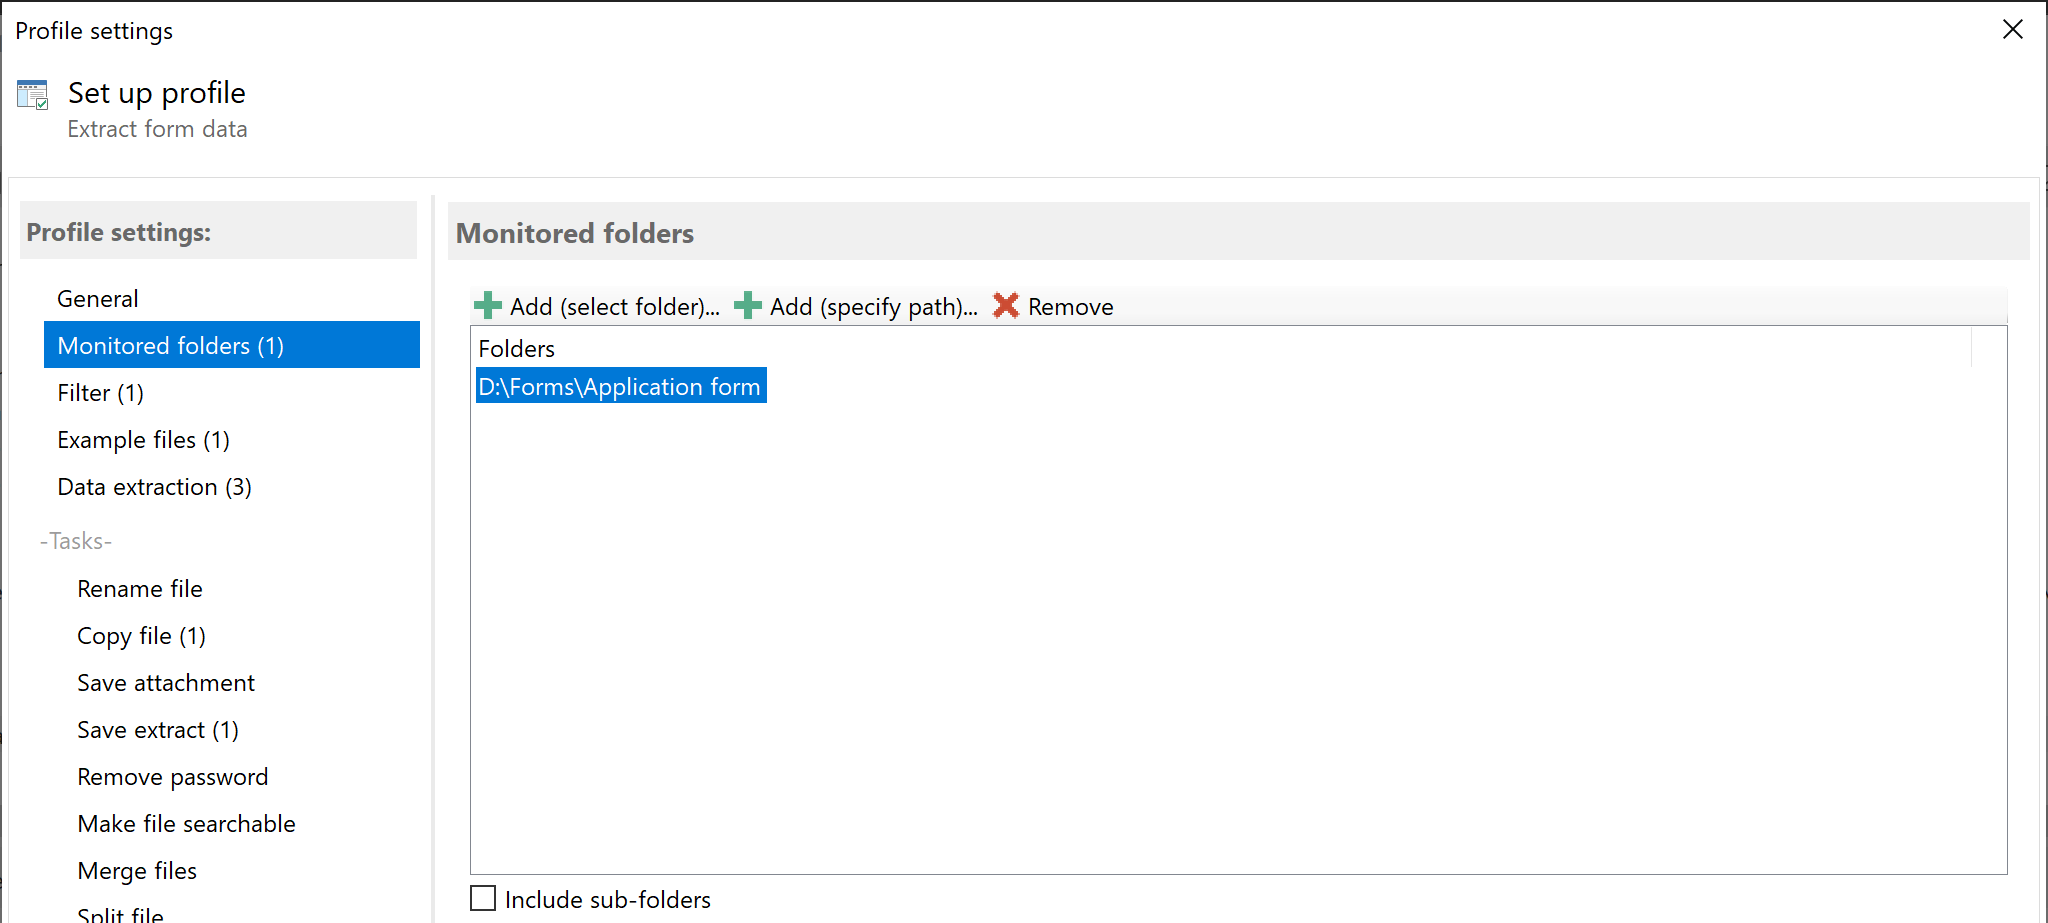
Specify the folder to be monitored
Next, select one or more folders. As soon as a new PDF file is placed in the monitored folder, the activated tasks are applied to
this file. In this case, the form data is extracted from the PDF documents and processed according to the settings. Older PDF
forms can be processed after the profile has been created by clicking the Catch-up button.
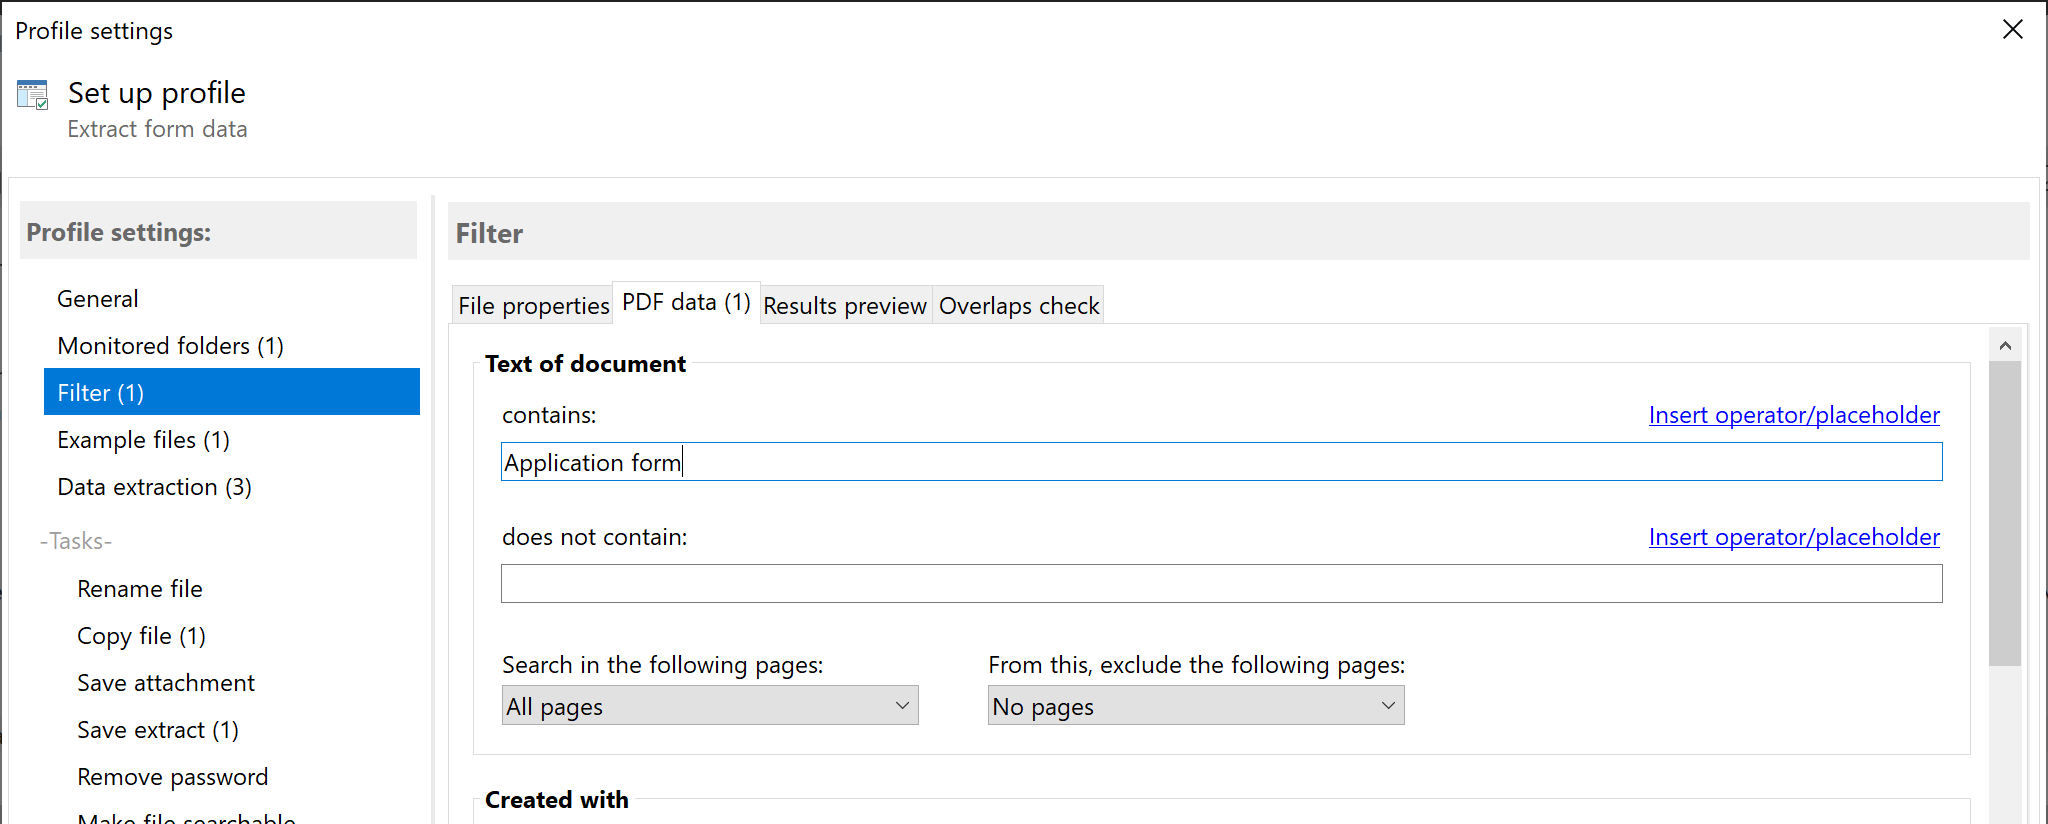
Set up filters
Optionally define filter criteria here to process only certain PDF forms. You can use file properties such as part of the file
name or document properties such as author, subject, or the document's text. Filter terms can be combined with logical AND and
OR. If you do not enter a filter term, all incoming PDF files in the monitored folder are processed automatically.
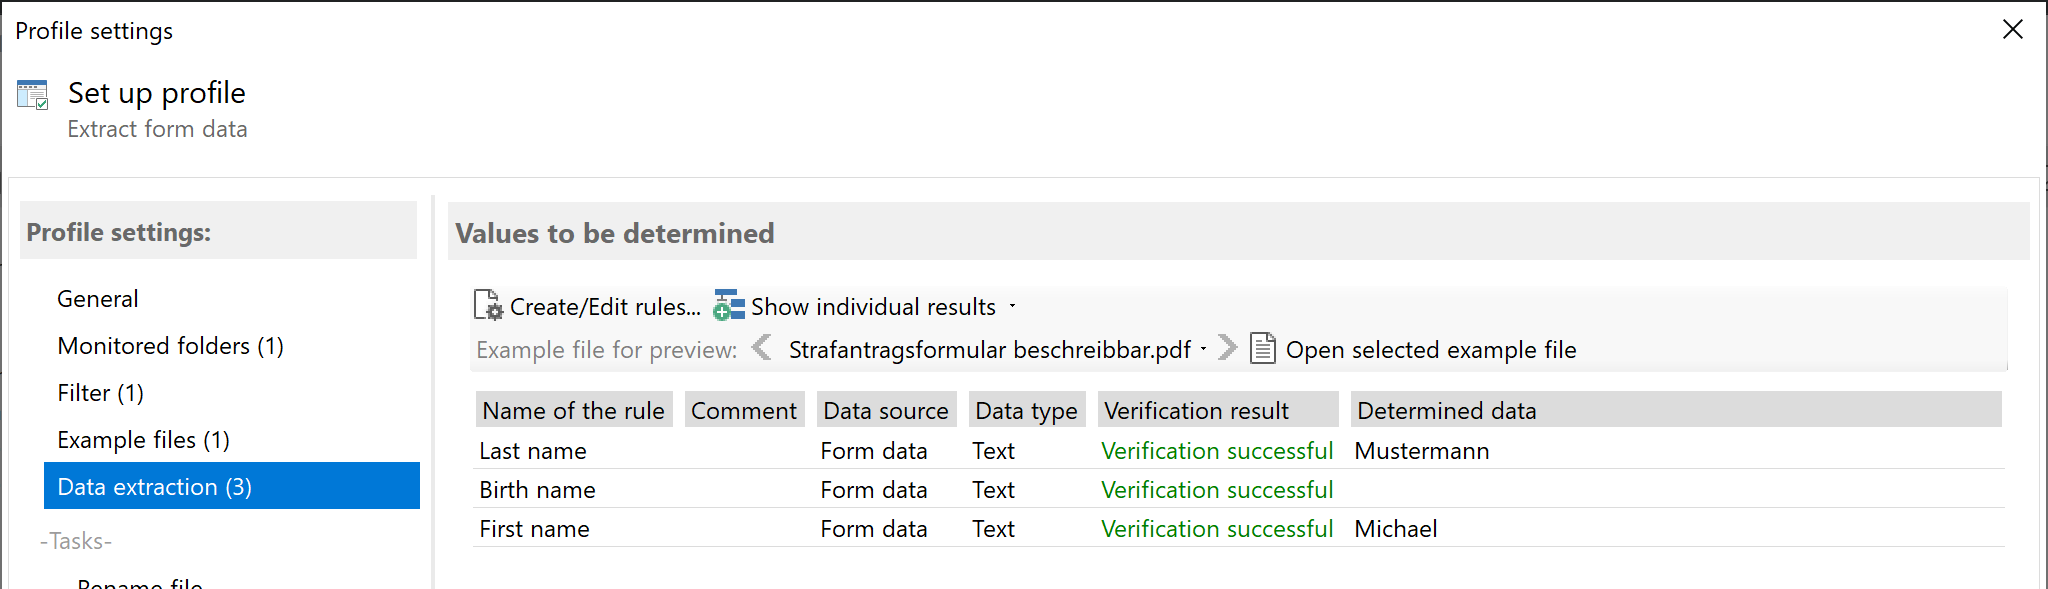
Select and configure the 'PDF form data' data source
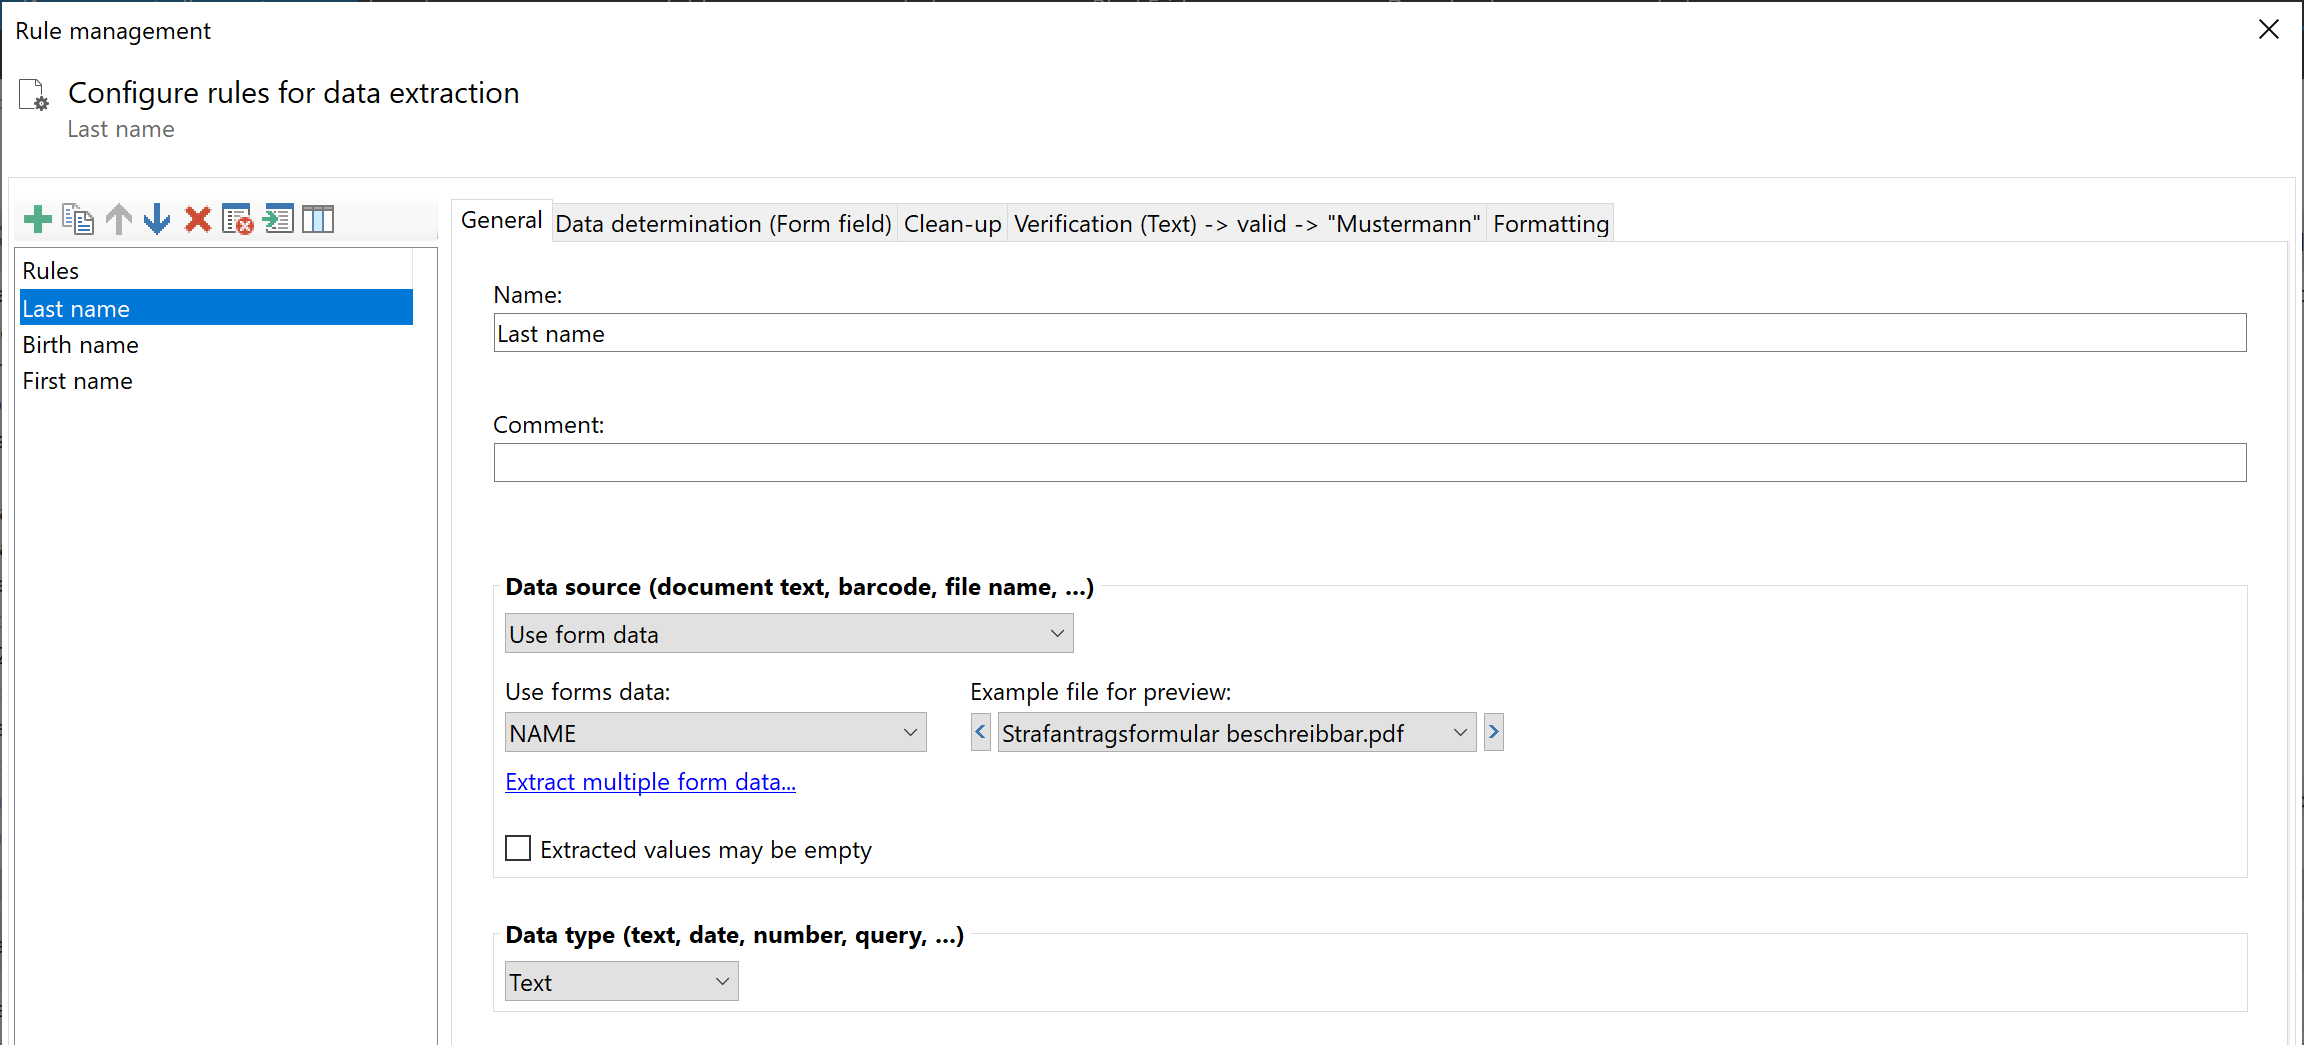
In the 'Data extraction rules' category, click 'Create new rule'. In the rule management, select the 'Form data' type from the
list of data sources. A list of field names is displayed in the now available settings. If several fields have the same name,
the displayed field name is supplemented by the page number (only for multi-page forms) and the occurrence number. You can also
specify whether the value of the selected form field may be empty.
The selected form field and the extracted data are previewed on the 'Data determination' tab. Multiple selections for list
values are supported. The extracted value of checkboxes or yes/no fields is j for yes and n for no. The extracted form data can
be exported to a CSV file using the 'Save extract' task or for naming. When exporting to a CSV file, a distinction can be made
between a single file or a collective file to have the data of several PDF forms available in one file.
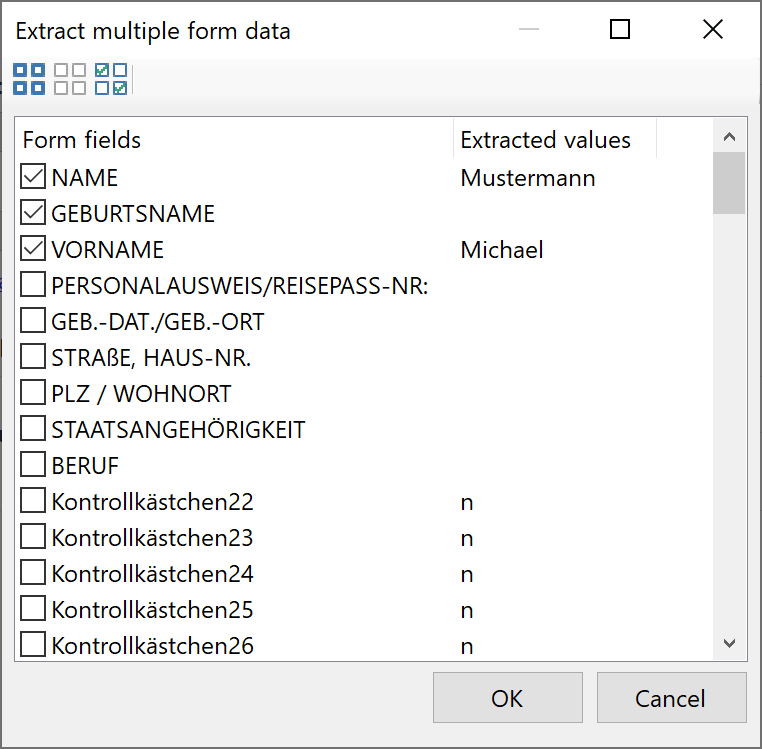
Extract multiple form data
Click on the link of the same name in the configuration area to open the selection window. You will see a list of the available
form fields and their extracted value there. Check the corresponding entries and confirm with OK to have the rules created
automatically. If the checkmark is removed again, the corresponding rule is also removed from the list of data extraction rules.
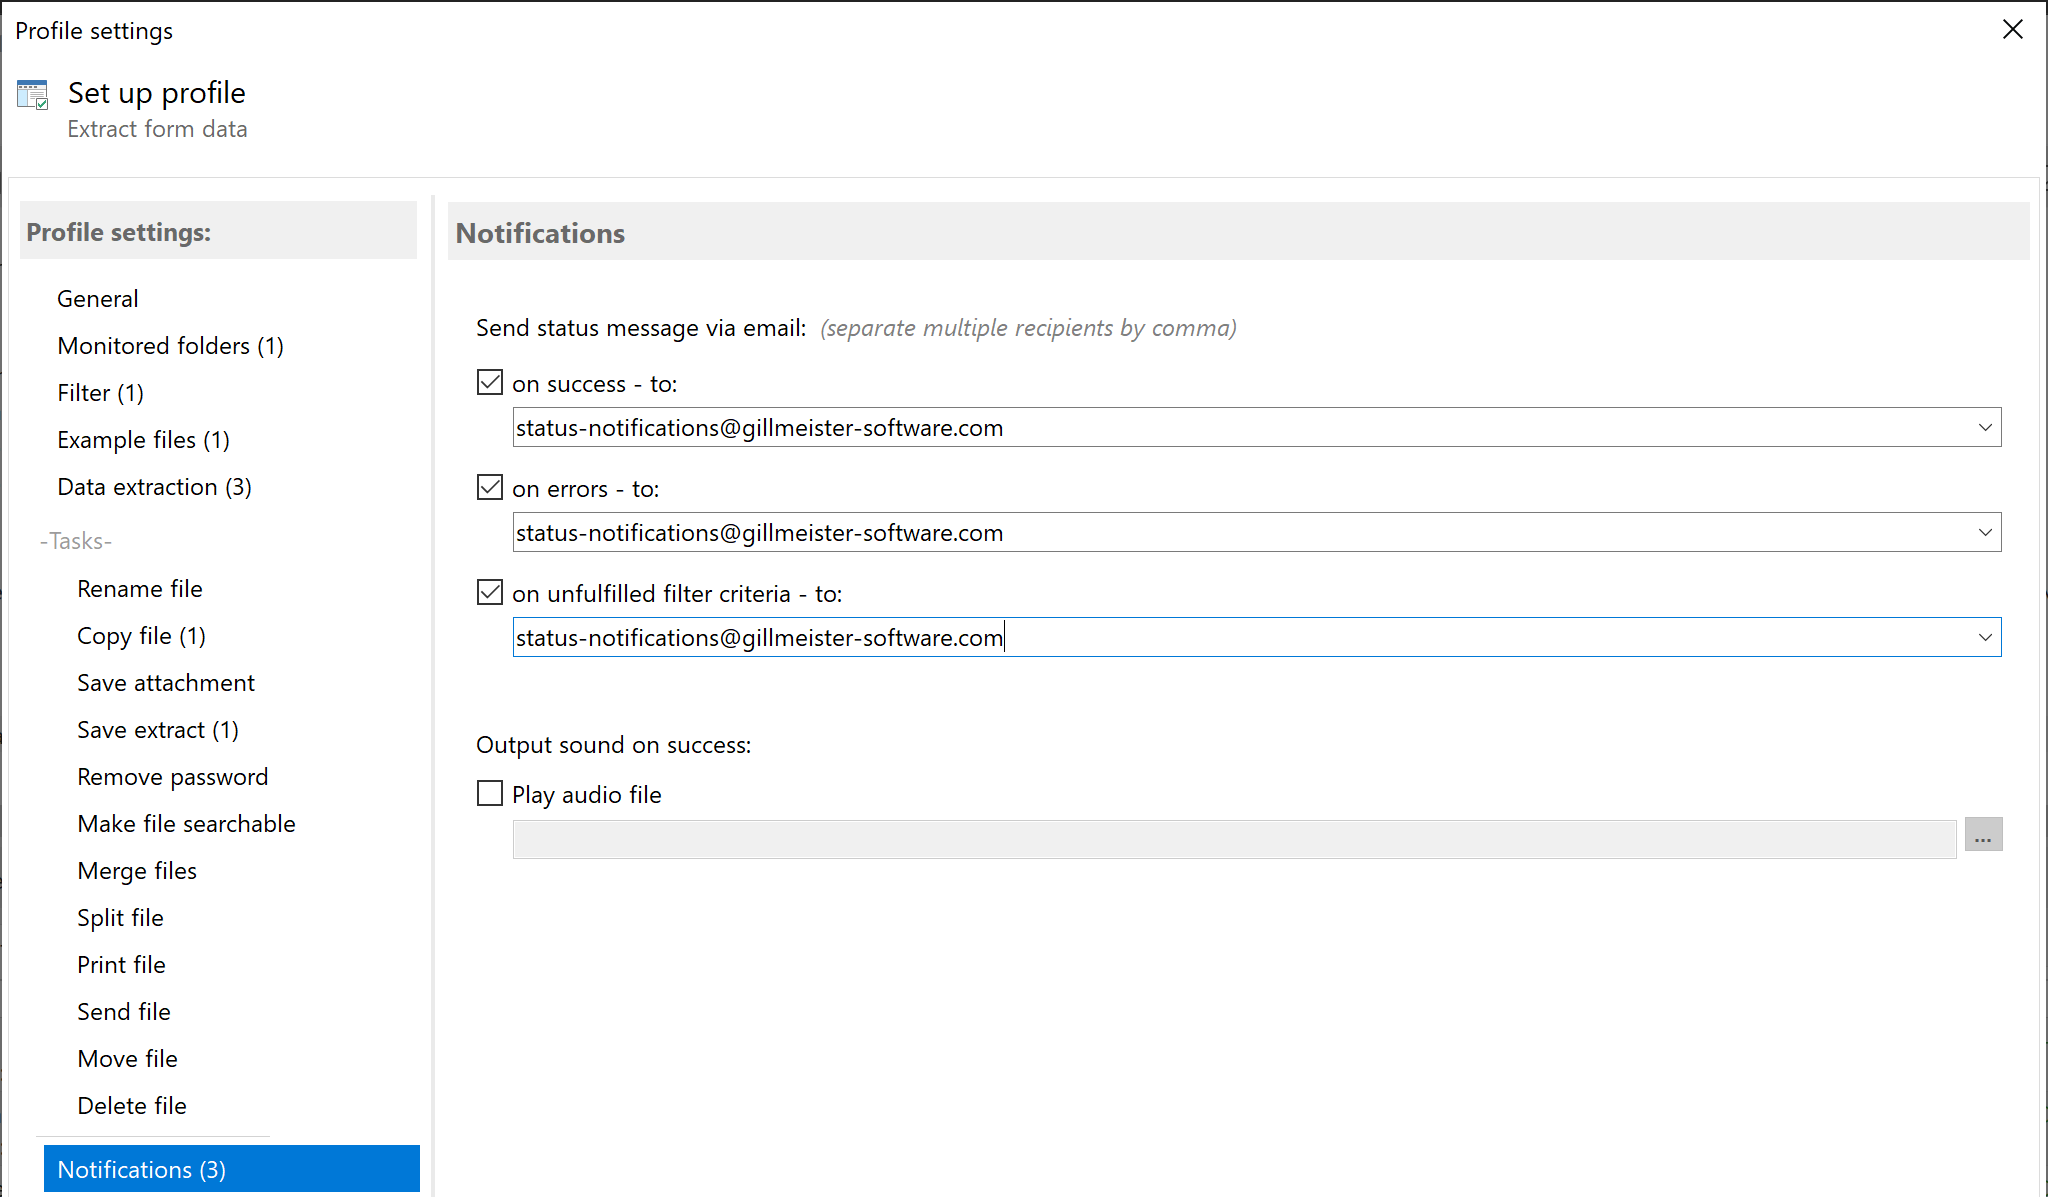
Status notifications
Finally, you can specify in this category whether status messages (success, error, no match, no text, ...) about
processing each PDF document should be sent to a specific email address. You can either use the Outlook email
account set as the default, Exchange Online, or an SMTP server to send the status messages.
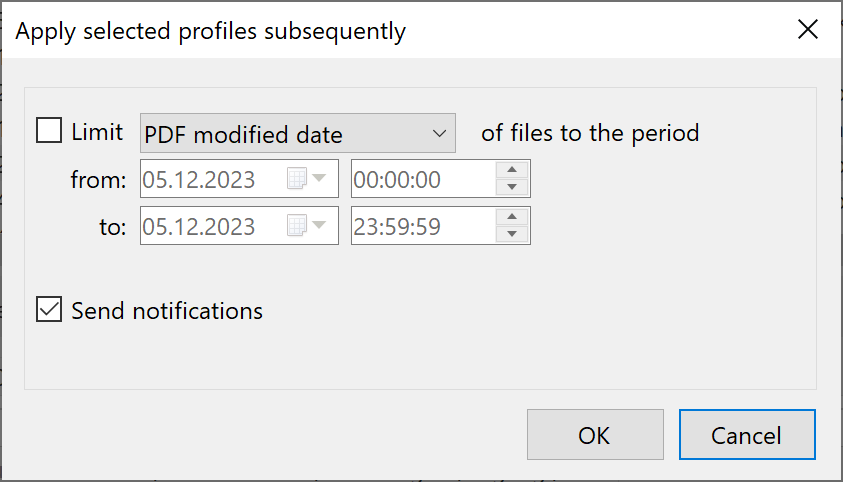
Catching up (evaluate older PDF forms)
Finally, there is also the option to apply the created profile to all PDF files for a specific period, i.e., to export all
matching PDF forms. To do this, select the created profile in the list and click Update. Otherwise, the profile will only be
applied to all new incoming PDF files in the monitored folders.