Step-by-step instructions for automated printing of emails/attachments with Automatic Email Processor for Microsoft Outlook
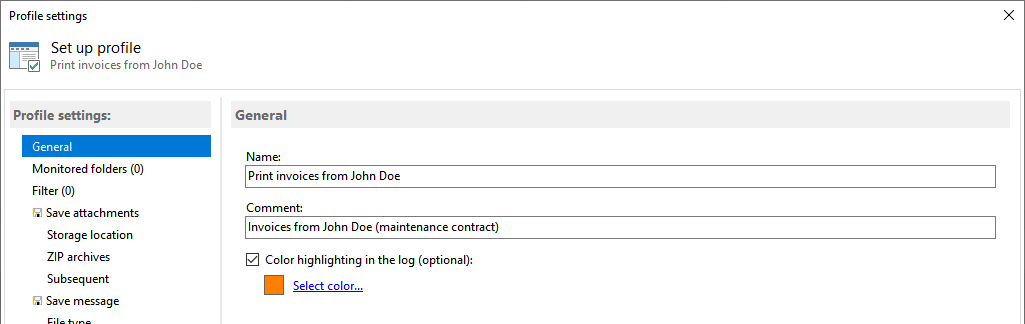
Create a new profile
First click on the button labaled "New profile..." in the upper toolbar. The program creates a new profile and
opens it in the configuration editor. Give the profile a name (e.g. Print invoices from company X) and optionally enter
a comment. It is possible to highlight the profile in the log list in order to quickly distinguish between the tasks
performed. To do this, activate the option "Color highlighting in the log" and use the button
"Select color..." to define an individual color for the profile.
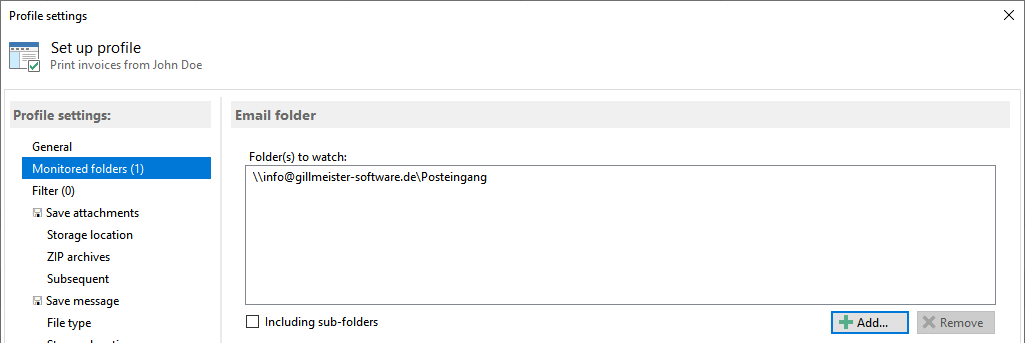
Specify the email folder to be monitored
Select one or more Outlook email folders to which you want to apply the current profile. Click "Add..." and
select one of the Outlook email folders listed. For example, this might be the Inbox folder of your main email account.
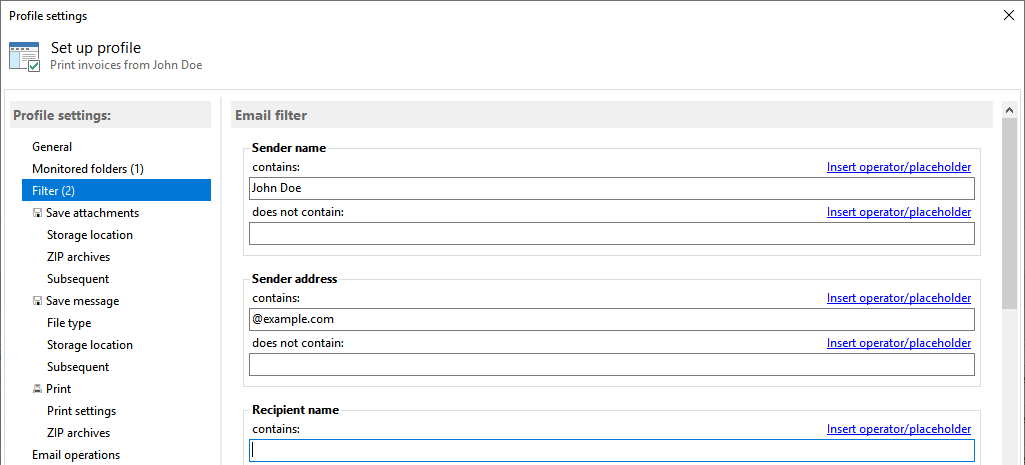
Configure filters
Set the filter criteria to ensure that only the relevant emails are printed automatically. For example, enter sender
address, subject, and part of the file name.
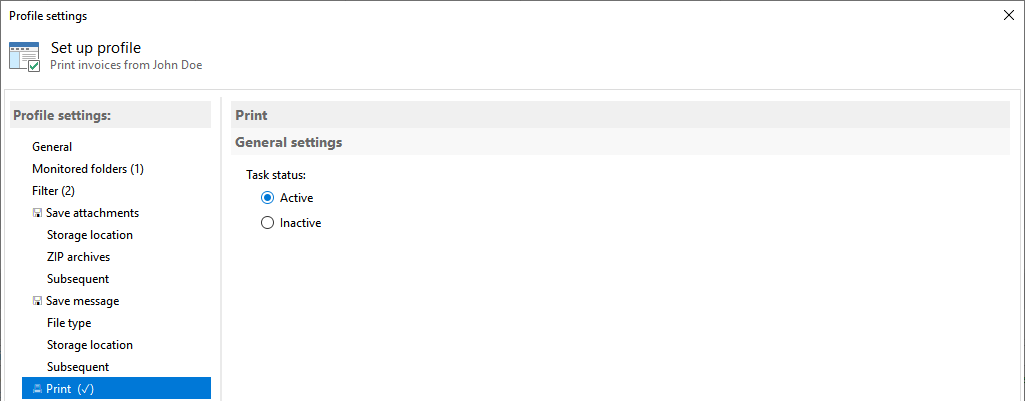
Activate task Print
Click on the category Print and set the task status to "Active".
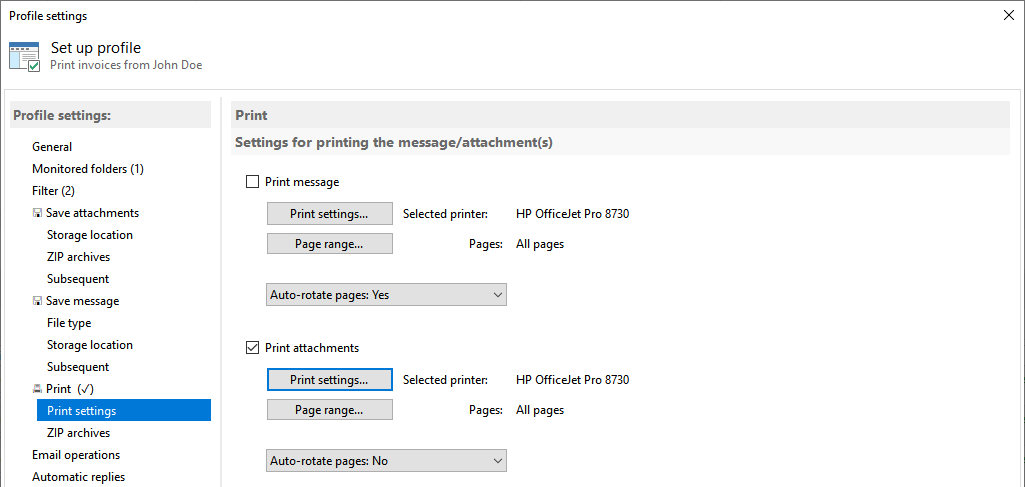
Print settings for email message or attachment
At this point the objects to be printed are selected. The following options are available:
- Print email message
- Print email attachments
Click Print Settings to open the printer selection dialog and specify any additional settings, such as the number of copies.
With a click on the button "Page range...", you can optionally exclude pages from printing or print only certain
pages of the attachment or email message.
If the option Print Email Attachments is selected, only the attachments included in the filter will be printed. To print all
email attachments, you can either leave the filter for the file name empty or, as a precaution, specify a term that will
appear in the name of all expected attachments (e.g., pdf).
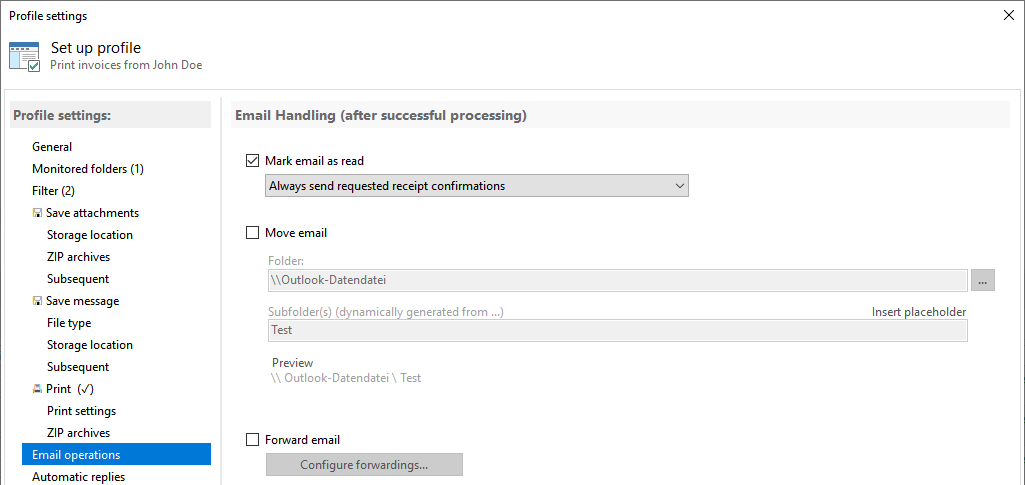
Email operations (after successful processing)
Here you can set options for the processed email. For example, the email can be marked as read or moved to
any Outlook folder after it has been printed.
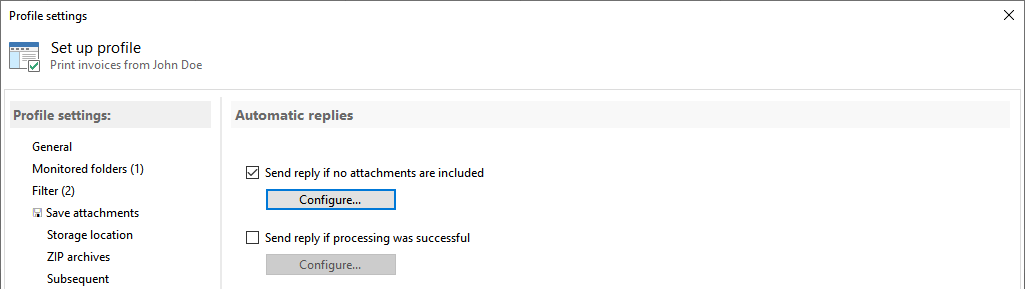
Automatic replies
If the sender of a message is to be informed of a status, this can be configured here. You can send a message if other filter
criteria match, but no attachments are included, or in case you want notify the sender about a successful processing. In the
program options you can set whether SMTP or the default Outlook account should be used for sending.
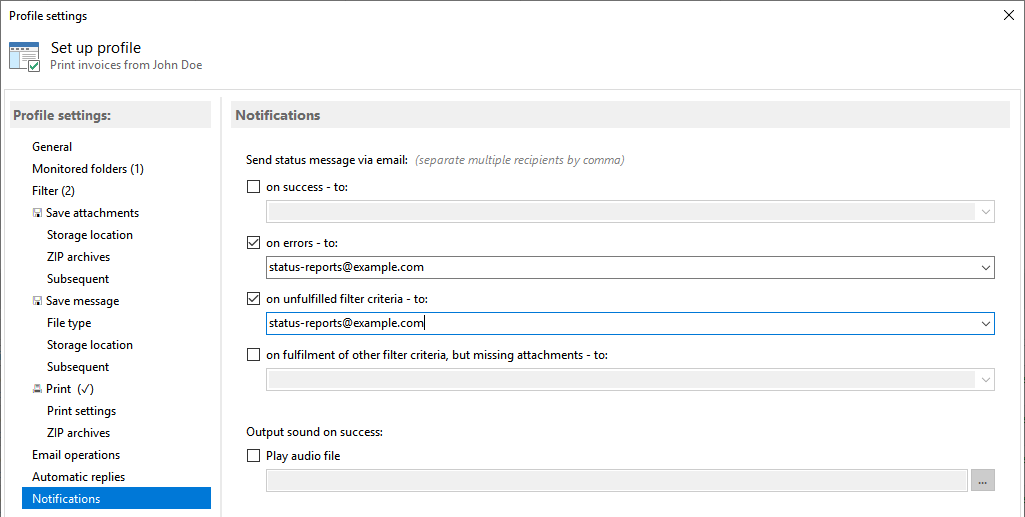
Notifications
The next step is to specify whether status messages regarding the processing of each email are to be sent to a particular
email address. The email can be sent using either the default Outlook email account or an email account with user-defined
properties. After successfully printing the email or email attachment, any sound file can be played.
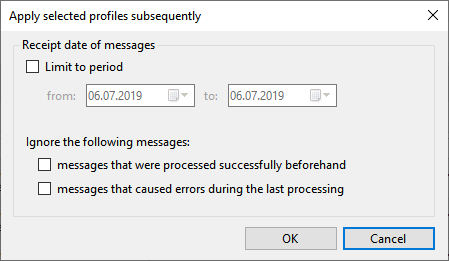
Catch-up (print older emails)
Finally, there is the option to apply the configured profile to all emails or the emails of a certain period, i.e. to print
out all matching emails. To do this, select the created profile in the profile list and click on "Catch-up". Otherwise
the profile will only be applied to all new incoming emails of the monitored Outlook folders.